Why Fixing Sprinkler Leaks Saves Your Lawn and Your Wallet
Sprinkler system leak repair is something every Cape Cod homeowner should know about. Here’s the quick fix if you’re in a hurry:
- Identify the leak location (check for wet spots, reduced pressure, or use your water meter’s drip indicator)
- Turn off water to your system and shut down the controller
- Dig carefully around the leak site (call 811 first to mark utilities)
- Replace damaged components (heads, pipes, valves, or fittings)
- Test the repair by slowly turning water back on
That puddle forming in your yard isn’t just ruining your shoes—it’s draining your wallet too. The average sprinkler leak can waste thousands of gallons of water annually and add hundreds to your utility bills. And on Cape Cod, where our sandy soil already makes water conservation challenging, fixing leaks quickly is even more important.
A leaking sprinkler system isn’t just an inconvenience; it’s a problem that compounds over time. Water pooling near your home’s foundation can cause structural damage, while soggy lawn areas become breeding grounds for fungi and pests.
“A small leak that costs $11 to fix yourself could save you $200 in professional fees and even more in water bills,” shared one homeowner who tackled a simple PVC pipe repair. Most homeowners can handle basic repairs themselves, saving $100-$300 per fix compared to hiring a professional.
The good news? Many sprinkler leaks are surprisingly simple to diagnose and repair. With the right tools and techniques, you can often fix the problem in a single afternoon—even if you’ve never done it before.
In this guide, we’ll walk you through finding and fixing common sprinkler system leaks, from broken heads to underground pipe cracks. We’ll cover when to DIY versus when to call in the pros, and share maintenance tips to prevent future issues.
How to Tell You Have a Leak
Ever walked across your lawn and felt that unexpected squish beneath your feet? That soggy surprise is often your first clue that something’s amiss with your sprinkler system. At Best Cape Cod Irrigation, we’ve helped countless homeowners who didn’t realize they had a leak until their water bills suddenly shot through the roof.
Let’s talk about the warning signs that should have you reaching for your shovel – or your phone.
That unexplained spike in your water bill is usually the first red flag. When your monthly statement suddenly jumps without any change in your household water habits, your sprinkler system is often the culprit. Our Cape Cod customers are often shocked to find how much water (and money) a single leaking sprinkler head can waste.
Take a walk around your property after the sprinklers have been off for several hours. Soggy spots that never seem to dry out are practically screaming “leak below!” You might also notice water bubbling up from the ground like a tiny fountain – that’s pressurized water escaping from a broken pipe or connection.
Reduced water pressure in certain zones is another telltale sign – when those sprinkler heads that used to spray six feet are barely reaching three, something’s letting water escape before it reaches its destination. And don’t ignore those surprisingly lush green patches in your otherwise uniform lawn. What looks like a blessing is actually a sign that an underground leak is providing those lucky grass blades with a constant drink.
Check your valve boxes for standing water, which typically indicates a problem with the valve itself. And keep an eye out for mold or mildew developing on exterior walls – this can signal a hidden sprinkler leak nearby that’s creating unwanted moisture.
Visual & Meter Checks
Your water meter is like a detective that never sleeps – it can help confirm your suspicions about a leak. Here’s a simple test our Cape Cod technicians recommend:
Turn off all water in your home completely – no running dishwashers, no flushing toilets, no ice makers filling up. Then locate your water meter (usually near the street in a concrete box) and find the low-flow indicator – typically a small triangle or dial that rotates even with minimal water flow.
If that indicator is moving when all water is supposedly off, you’ve got a leak somewhere. To determine if it’s your sprinkler system leak, turn off the valve to your irrigation system only. If the meter stops its dance, you’ve found your culprit.
For a more targeted approach, run each irrigation zone one by one. Watch for heads that aren’t spraying properly, water pooling between sprinklers, or areas where water seems to be bubbling up from underground. Sprinkler heads shooting dirty water are waving a red flag – that means there’s a break allowing soil to enter the line.
Pro tip: Keep some landscape flags handy to mark problem spots while the system is running. Your future self will thank you when it’s time to dig.
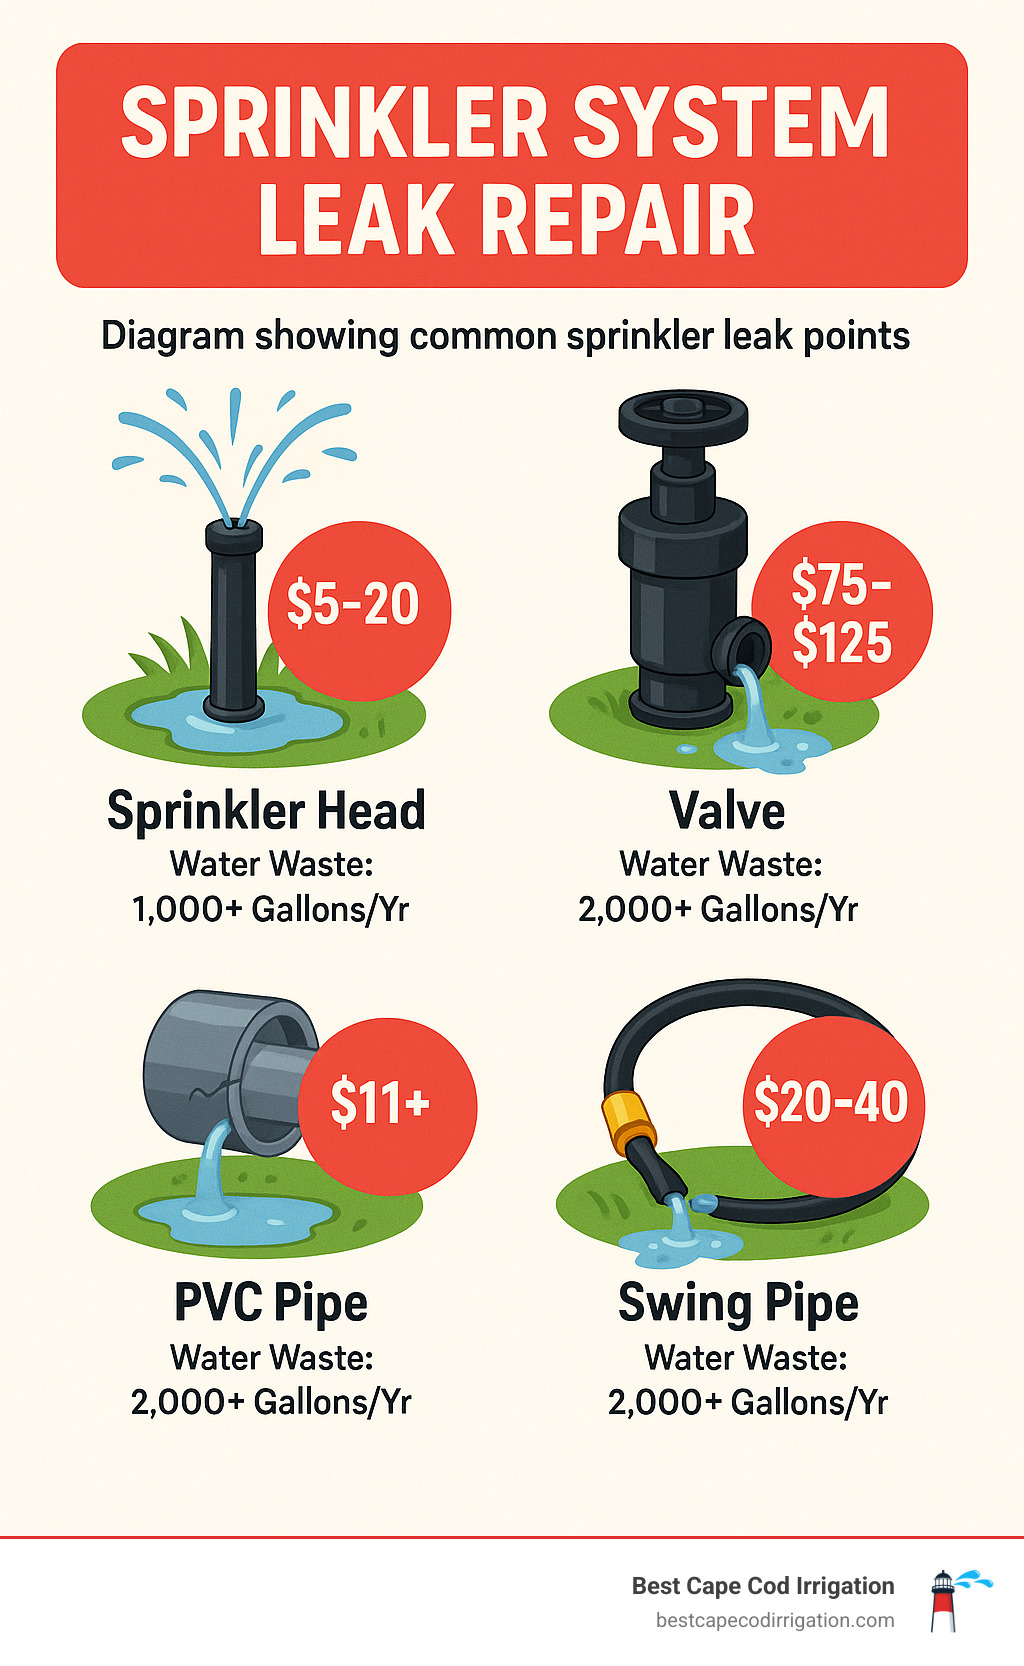
Common Leak Hot-Spots
After 25+ years of digging up Cape Cod yards, we’ve found some predictable trouble spots:
Sprinkler heads are the most vulnerable components – they’re constantly exposed to lawn mowers, foot traffic, and our harsh freeze-thaw cycles. Fortunately, they’re also typically the easiest to fix.
Swing pipe connections (that flexible black tubing connecting heads to the main line) often develop leaks at their connection points, especially in our sandy Cape Cod soil that shifts seasonally.
PVC main lines can crack due to freezing, ground settling, or accidental damage during other yard work. These underground leaks can be trickier to locate but often reveal themselves through persistent wet spots.
Valves and solenoids contain rubber diaphragms that deteriorate over time, or they can get jammed with debris that prevents proper sealing. A constantly running zone or flooding valve box usually points to valve issues.
Backflow preventers are critical components that protect your drinking water, but they’re also common leak sources, especially after winter’s harsh effects on our Cape Cod systems.
Understanding these failure points can help you narrow down your search and make the repair process much more efficient – whether you’re tackling it yourself or calling in our team for help.
Gear Up: Tools, Parts & Safety Prep
Let’s face it—there’s nothing worse than being elbow-deep in mud with a leaking pipe and realizing you forgot that critical coupling at the hardware store. Before you start your sprinkler system leak repair trip, let’s make sure you’re properly equipped.
Think of this as your treasure hunt checklist. You’ll need a small shovel or Geneva spade for precise digging (your lawn will thank you), pipe cutters for those clean PVC cuts, and an adjustable wrench for those stubborn fittings. Don’t forget a screwdriver set, garden trowel, and a trusty bucket to collect water and corral all those tiny parts that love to disappear into the grass.
Your safety gear is non-negotiable—good gloves will save your hands from cuts and blisters, while eye protection is essential when working with pressurized systems or PVC cement. And grab some landscape flags to mark those problem spots—future you will appreciate not having to refind them.
Parts-wise, have replacement heads that match your existing system, PVC primer and cement for rigid pipe repairs, and compression couplings for quick connections. Teflon tape is a lifesaver for threaded connections, and don’t forget waterproof wire connectors if you’re venturing into solenoid territory.
Most of these supplies are readily available at your local hardware store. When in doubt, snap a photo of your existing components before shopping—it’s much easier than trying to describe that “plastic thingy with the weird threads” to a store employee.
For more detailed recommendations on the tools and parts we’ve found most reliable over our 25+ years on Cape Cod, visit our FAQs page.
Average DIY Costs vs. Hiring a Pro
One of the sweetest rewards of DIY sprinkler system leak repair is keeping your hard-earned money in your pocket. Let’s break down the savings:
| Repair Type | DIY Cost | Professional Cost |
|---|---|---|
| Sprinkler head replacement | $10-$30 | $50-$150 |
| Valve repair/replacement | $20-$90 | $125-$375 |
| Broken pipe section (PVC) | $11-$50 | $200-$600 |
| Solenoid replacement | $15-$45 | $100-$300 |
| Controller issues | $25-$100 | $150-$450 |
| Major system overhaul | $200-$500 | $500-$1,500 |
Note: These are average costs based on internet data, not actual costs for Best Cape Cod Irrigation services. Professional costs typically include labor, expertise, and warranty coverage.
The numbers don’t lie—fixing that cracked PVC pipe yourself might cost around $11 in materials, while a professional service could run $200 because you’re paying for expertise and labor. That’s the difference between a coffee date and a nice dinner out!
Dig Safe & Stay Dry
Before your shovel hits dirt, let’s talk safety—because nobody wants to turn a simple repair into an accidental utility line disaster.
Always call 811 before digging. This free service marks underground utilities so you don’t accidentally hit gas, electric, or communication lines. It’s not just smart—it’s the law, and waiting the required 72 hours is far better than the alternative.
Know where your sprinkler system’s shut-off valve lives—usually where the irrigation line branches from your main water supply. Turn it off completely, then power down your controller to prevent any surprise showers while you’re working. Run a manual cycle afterward to release any pressure lurking in those lines.
Water and electricity mix about as well as oil and vinegar—which is to say, not at all. If your repair involves electrical components like solenoids or controllers, cut power at the breaker before you start. Your heart will thank you for not providing it with unexpected shock therapy.
With your tools gathered, safety precautions taken, and a clear understanding of the costs, you’re ready to tackle that leak like a pro—without paying pro prices. Let’s roll up those sleeves and save some water, money, and Cape Cod’s precious resources!
Sprinkler System Leak Repair: Step-By-Step Fix
Now that you’ve pinpointed the leak and gathered your supplies, it’s time to roll up your sleeves and get to work. Don’t worry—I’ll walk you through the most common sprinkler system leak repairs you’re likely to face on your Cape Cod property.
A successful repair starts with proper preparation. Even the National Fire Protection Association (NFPA) Standard 25 emphasizes regular inspection and maintenance of water systems for reliability. Your home irrigation deserves the same careful attention!
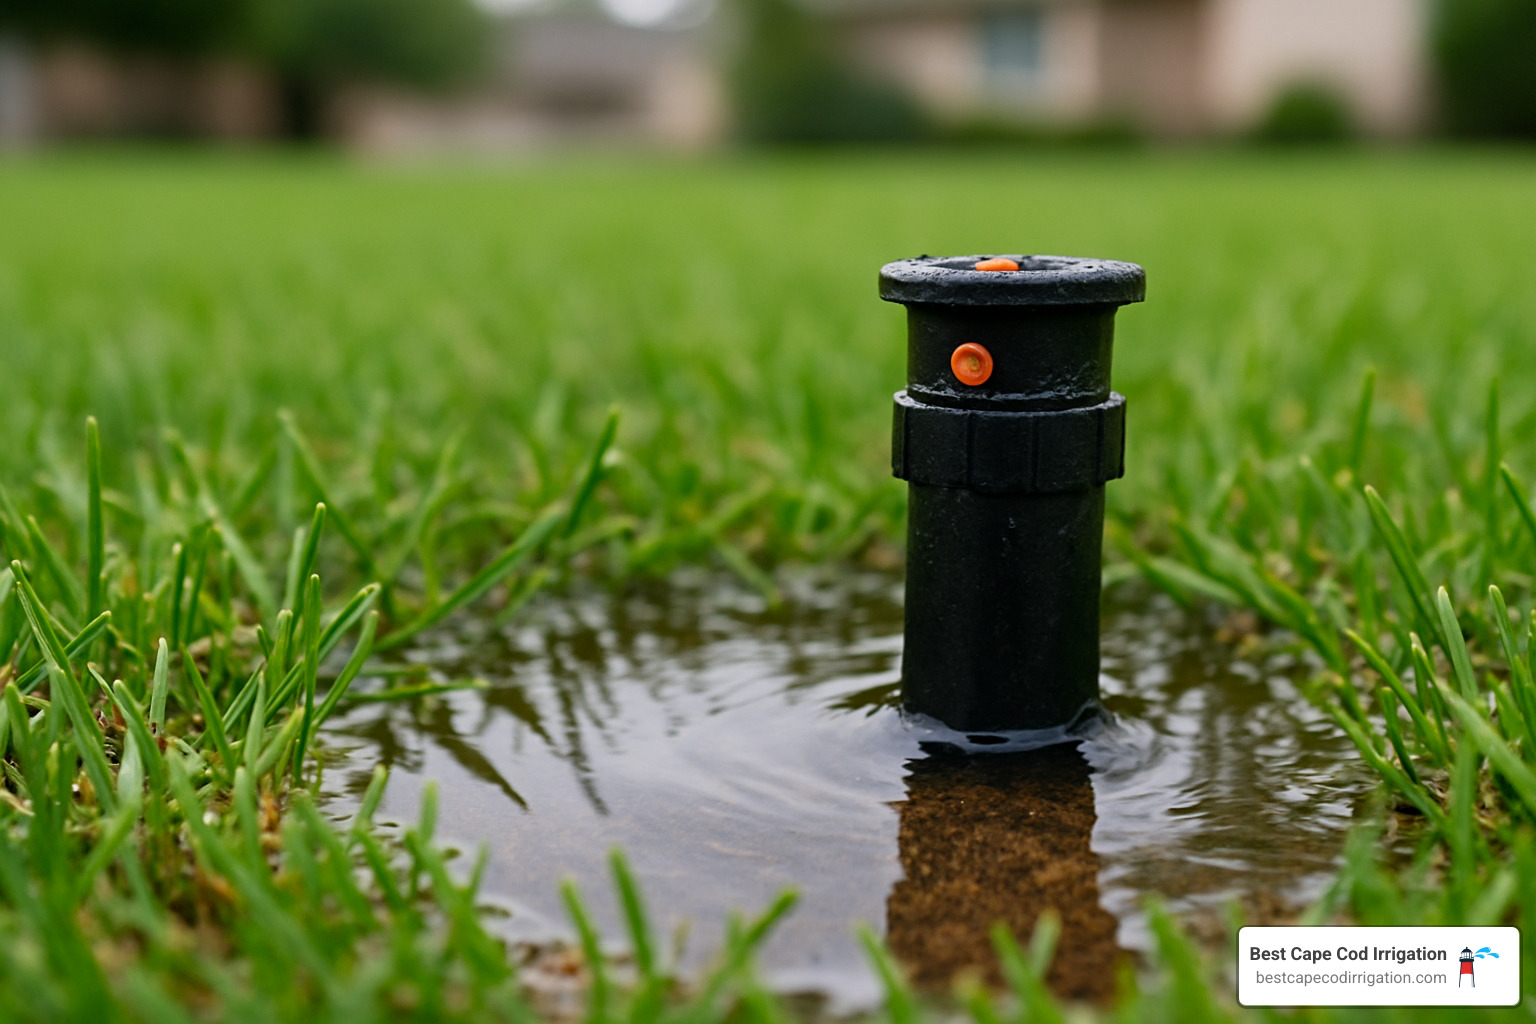
Sprinkler System Leak Repair at the Head
Broken sprinkler heads are the number one issue we see across Cape Cod properties—thankfully, they’re also the simplest to fix. Here’s how to handle it like a pro:
Start by finding the troubled head where water pools or sprays irregularly. Carefully dig a small 6-12 inch circle around it—think of it as creating a tiny workshop in your lawn. Avoid sharp tools that might damage the pipes below.
Hold the vertical riser pipe steady with one hand while unscrewing the head counterclockwise with the other. Once removed, take a moment to inspect the riser for any cracks or damage. If it looks compromised, you’ll need to replace that too.
Before installing the new head, clean those threads thoroughly and wrap them with 2-3 layers of Teflon tape (always wrap clockwise). Then gently screw on your new sprinkler head by hand—skip the wrench, as overtightening can crack the plastic.
Here’s a tip from our technicians: Before covering everything back up, run a quick test to make sure your new head works properly. Only after confirming everything’s watertight should you carefully replace the soil around the head.
Is your sprinkler just sputtering or spraying unevenly? It might simply be clogged rather than broken. Try disassembling the head according to the manufacturer’s instructions, rinsing out any sand or debris (we get plenty of that in our Cape Cod soil!), and reassembling before buying a replacement.
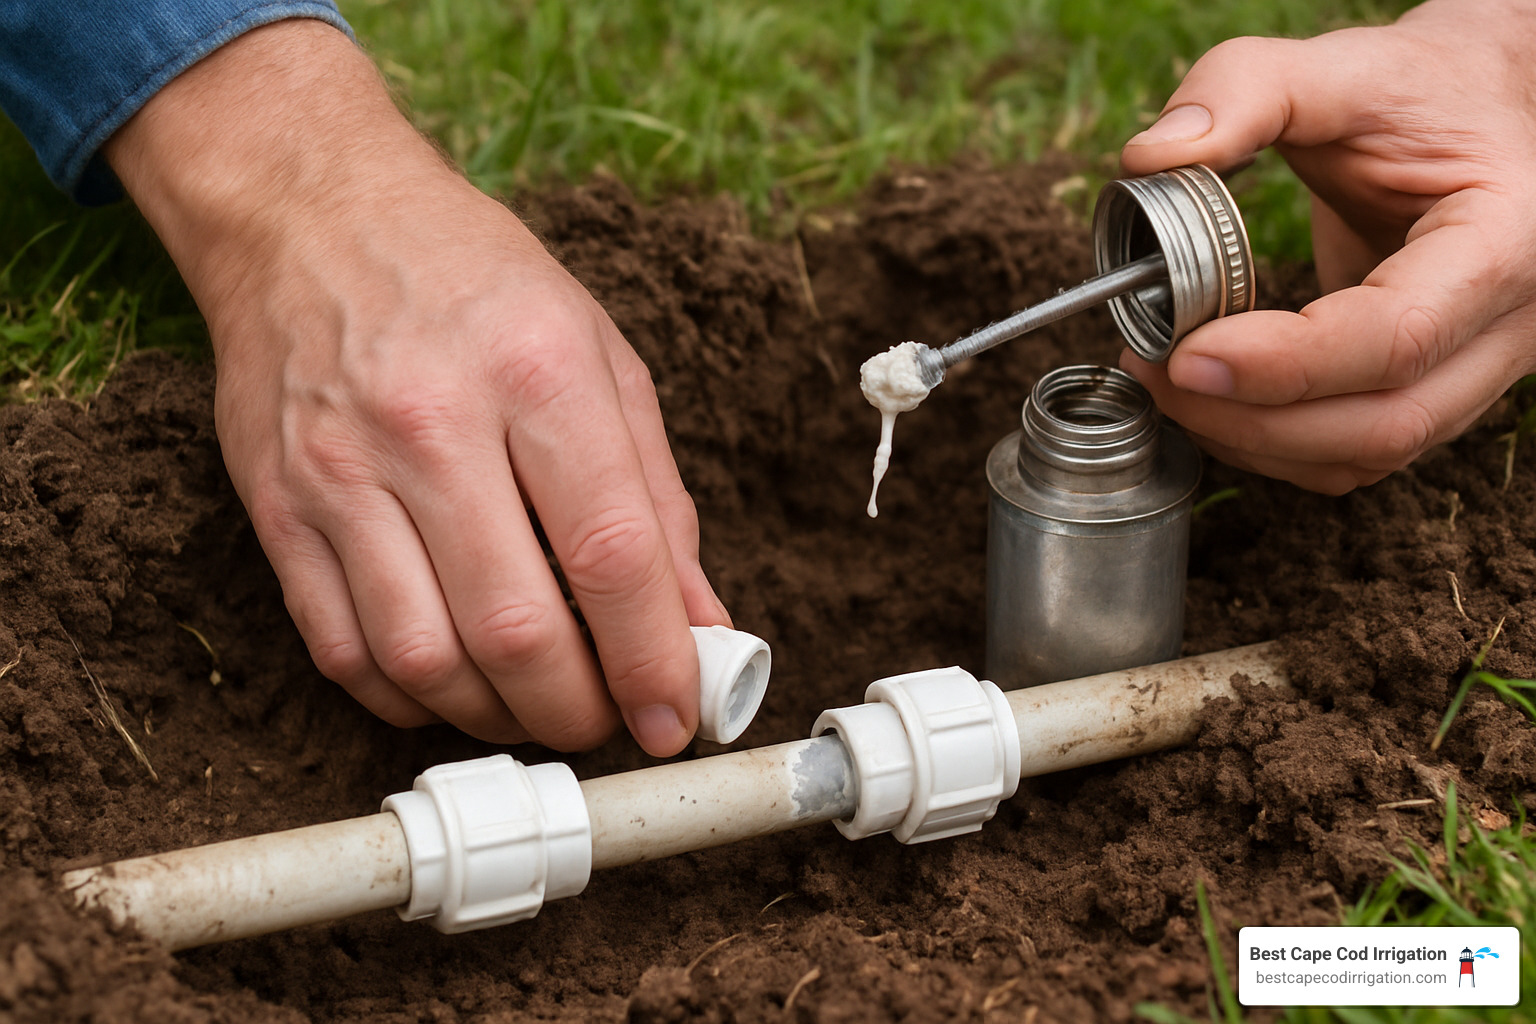
Sprinkler System Leak Repair on Underground Pipe
Underground pipe repairs take a bit more effort but are still very doable for most homeowners:
First, you’ll need to play detective. Run the zone and look for telltale bubbling water or unusually soggy spots. Mark these spots with a landscape flag while the system is running—it’ll save you from digging blindly later.
After calling 811 for utility marking (never skip this step!), carefully dig around your marked area. Expose at least 12 inches of pipe on each side of the damage to give yourself plenty of working room. Remember to shut off the water and depressurize the system before making any cuts.
Using pipe cutters (not a saw), make clean, straight cuts to remove the damaged section. Cut at least 2 inches beyond any visible damage to ensure you’re working with healthy pipe. For PVC repairs, cleanliness is crucial—apply primer to both the pipe ends and the inside of your couplings, followed immediately by PVC cement. Work quickly, as the cement begins setting within seconds!
Patience pays off here—give your PVC repair at least 20 minutes to cure properly before testing. Our Cape Cod customers often ask if they can speed this up, but trust me, those 20 minutes will save you hours of frustration later. When you’re confident the repair has set, slowly restore water pressure and check for leaks before carefully backfilling the hole.
For flexible poly pipe (less common on Cape Cod but used in some systems), you’ll use compression couplings instead. Slide them onto each pipe end, insert barbed fittings if needed, and tighten the compression rings for a secure connection.
Fixing Leaking Valves & Solenoids
Valve repairs are where things get a bit more technical, but still manageable with some care:
Start by locating your valve boxes—those rectangular plastic containers partially buried in your yard. Lift the lid and you’ll find the command center of your irrigation system. If you see standing water or obvious leaks, you’ve found your culprit. Not sure which valve controls which zone? Have a family member watch the sprinklers while you manually activate each valve.
Always turn off the water supply before working on valves. Then, use a small bucket or sponge to remove standing water and clear away any Cape Cod sand and debris that’s accumulated in the box.
When inspecting the valve, you’re typically looking for one of three issues: a torn diaphragm (the rubber seal inside), a faulty solenoid (the electrical component), or debris preventing proper closure. For diaphragm issues, you’ll need to unscrew the top of the valve, carefully remove the internal components, and replace them with a matching diaphragm kit.
Solenoid problems require a bit more care with the electrical connections. Take a photo before disconnecting anything, then unscrew the old solenoid and install the new one. When reconnecting wires, always use waterproof connectors—our humid Cape Cod climate will quickly corrode exposed connections.
After reassembly, restore water pressure gradually and run the zone to verify your repair worked. Valves truly are the heart of your irrigation system, so if you feel uncertain about this repair, it might be worth calling in our professionals to ensure it’s done right.
A properly executed repair doesn’t just fix today’s leak—it prevents tomorrow’s headaches and protects both your lawn and your wallet from unnecessary waste.
Keep It From Happening Again
An ounce of prevention is worth a gallon of water saved! With proper maintenance, your sprinkler system can last 15-20 years without major issues. As we tell our Cape Cod customers, those sandy soils might drain quickly, but they’re also tough on irrigation systems that aren’t properly maintained.
Monthly walk-throughs of your property during the watering season are your first line of defense. Take a slow stroll while your system runs, looking for those telltale wet spots, heads that seem sluggish, or areas with reduced pressure. It only takes about 15 minutes but can save you hundreds in repairs.
Seasonal maintenance truly makes the difference between a system that lasts and one that constantly needs repairs. Spring start-ups and fall winterizations are particularly crucial on Cape Cod, where our freeze-thaw cycles can wreak havoc on pipes and components. Our sandy soil might drain well, but it also means underground components shift more than in other regions.
“The most expensive repair is the one you could have prevented,” as we often remind our customers. Consider installing a pressure regulator if your municipal water pressure exceeds 80 PSI. Excessive pressure is like having your system constantly under stress—eventually, something’s going to give.
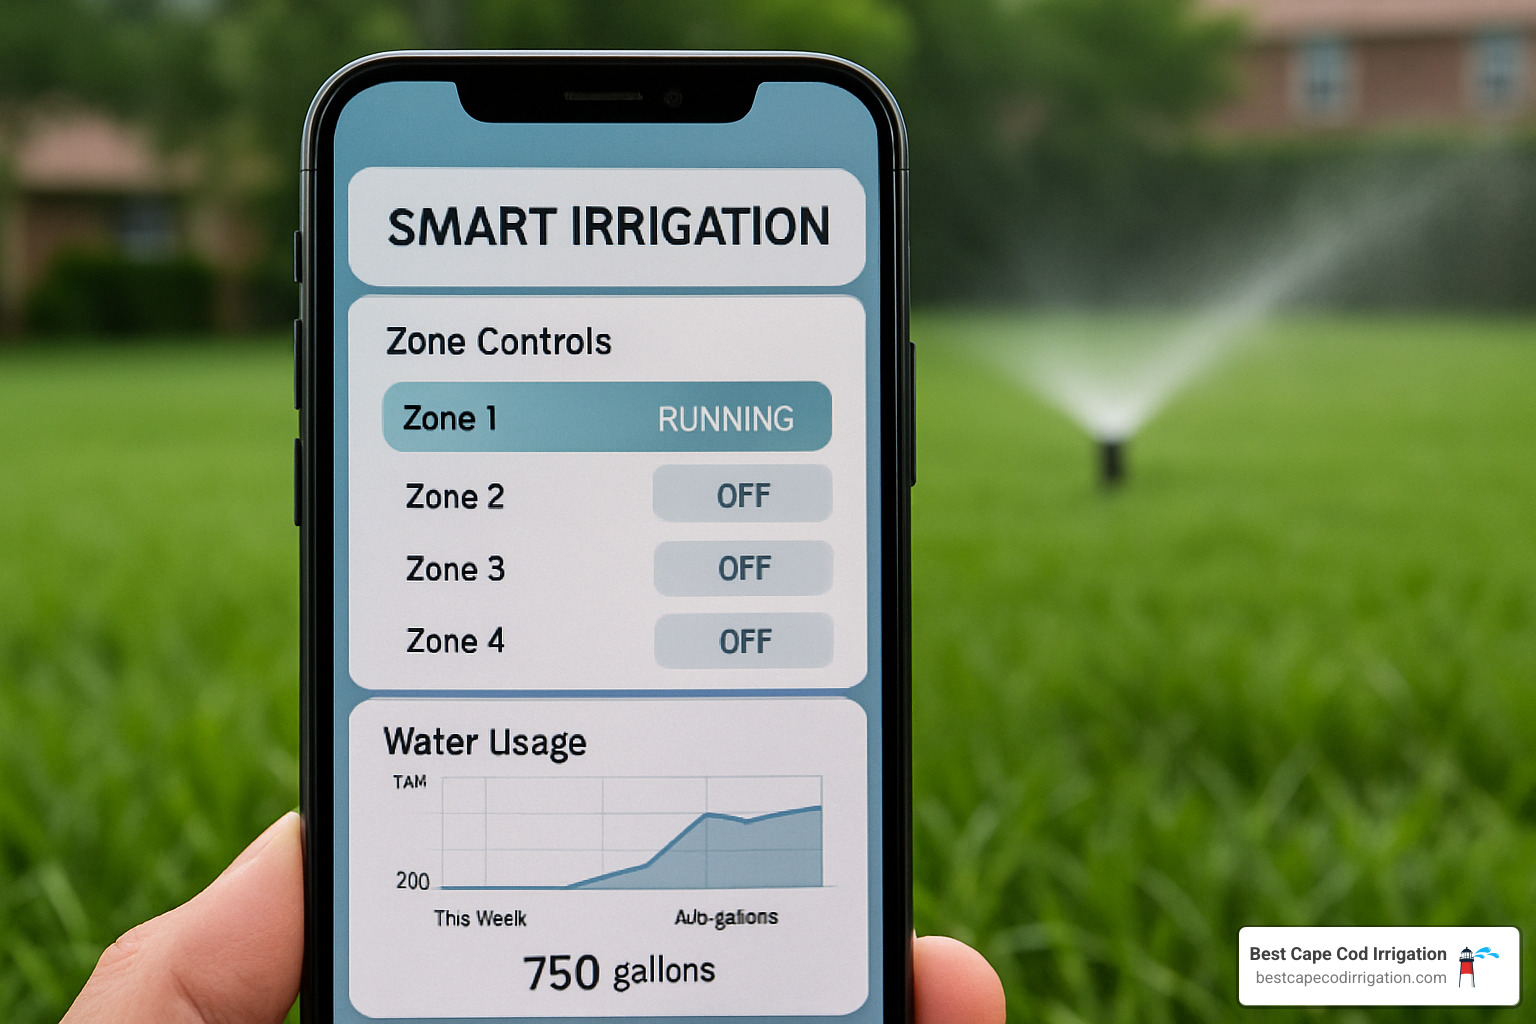
Smart controllers have revolutionized leak prevention. These modern marvels can detect flow abnormalities and automatically shut down zones when leaks are detected. Many of our customers find they pay for themselves in the first year through water savings alone, not to mention the peace of mind knowing your system won’t flood your yard if a pipe bursts while you’re away.
Don’t forget to clean filters regularly. Those small filters in sprinkler heads might seem insignificant, but they’re your system’s first defense against debris. Clean them annually or whenever you notice reduced flow—it takes just minutes but can prevent costly clogs.
For more detailed information about our maintenance services, visit our Irrigation Repairs & Maintenance page.
Quick Maintenance Checklist
A well-maintained system rarely surprises you with leaks. Here’s our field-tested maintenance approach to keep your sprinkler system leak repair needs to a minimum:
Spring: This is system wake-up time. Flush out any debris that settled during winter, adjust all heads that may have shifted during frost heaves, and test your backflow preventer. This is also the perfect time to check for any damage that might have occurred during winter.
Summer: As plants grow and fill in, your watering needs change. Clean those filters we mentioned, adjust spray patterns to accommodate seasonal growth, and check for any nozzles that might be clogged with our Cape Cod mineral-rich water.
Fall: Proper winterization is absolutely critical in our region. We can’t stress enough how important it is to blow out all water from your system before the first freeze. One missed zone can lead to multiple burst pipes come spring.
Year-round: Check valve operation, inspect wiring connections (especially in valve boxes where moisture can cause corrosion), and test rain sensors to ensure they’re functioning correctly.
Speaking of rain sensors—their placement is often overlooked. We frequently find sensors installed where they’re affected by outdoor showers, roof runoff, or excessive shade. Your rain sensor should be in an open area where it receives the same rainfall as your lawn, not tucked under an eave or hidden behind dense shrubs.
With these simple maintenance steps, you’ll not only prevent leaks but also extend your system’s lifespan while keeping your Cape Cod landscape lush and your water bill reasonable.
DIY or Call a Pro?
While many sprinkler system leak repairs are DIY-friendly, sometimes it makes more sense to bring in the experts. Let’s figure out when to roll up your sleeves and when to pick up the phone.
You can typically handle straightforward repairs yourself if you’re reasonably handy. Replacing a broken sprinkler head, fixing an accessible valve, or patching a minor pipe crack in an easy-to-reach area are all great DIY projects. These simple fixes can save you $100-300 compared to hiring a professional, and give you that satisfying feeling of solving a problem yourself.
“I replaced three sprinkler heads and fixed a small pipe leak for about $45 in parts,” shared one Cape Cod homeowner. “The quote I received was over $200, so I decided to try it myself. It took about two hours, but was surprisingly straightforward.”
However, some situations call for professional expertise. Deep main line breaks buried more than 18 inches underground require specialized equipment and expertise. Complex electrical issues with controllers or wiring can be both dangerous and difficult to diagnose without proper tools. And if you find water pooling near your home’s foundation, that’s a situation where quick, expert intervention could prevent thousands in structural damage.
The average professional service call for sprinkler repairs ranges from $125-$500, depending on the complexity of the issue. While this is more expensive than DIY, it includes expertise, proper parts, and often a warranty on the work. For more complex issues, costs can range from $500-$1,500, especially if extensive excavation or system redesign is needed.
According to recent research on repair costs, emergency service calls can add 50-100% to standard rates, but are worth it when water is gushing or electrical components are compromised.
Signs You Need Professional Help
After 25+ years of serving Cape Cod’s irrigation needs, we’ve identified several situations where professional intervention is almost always necessary:
Repeated leaks in the same area often indicate a systemic problem rather than a simple component failure. When you’re fixing the same section over and over, something bigger is likely happening underground.
Unexplained pressure loss across multiple zones could signal a main line issue or pump problem that requires specialized diagnostic equipment. These problems rarely have simple fixes and often worsen if improperly addressed.
Controller faults or electrical issues should never be taken lightly. Water and electricity are a dangerous combination, and modern irrigation systems have sophisticated electrical components that require proper testing equipment and knowledge.
Cape Cod’s shallow well systems have unique requirements and troubleshooting needs that differ from municipal water systems. The sandy soil and high water table in our region create specific challenges that local experts understand best.
If you’ve attempted a repair but the leak persists, or if you simply don’t feel comfortable working with tools or digging, there’s absolutely no shame in calling for help. Even experienced DIYers sometimes encounter problems beyond their expertise or equipment capabilities.
A professional brings not just technical skills but also regional knowledge about Cape Cod’s unique soil conditions, water regulations, and common system configurations—expertise that can save you time, money, and frustration in the long run.
Frequently Asked Questions About Sprinkler Leaks
How can I locate a hard-to-find underground leak?
Finding that elusive underground leak can feel like searching for buried treasure—without a map! After years of helping Cape Cod homeowners, we’ve developed a reliable approach that works well for those mysterious wet spots.
Start by isolating individual zones in your system. Turn on just one zone at a time to narrow down which area might be problematic. This simple step often saves hours of frustrating guesswork.
Early mornings offer the perfect detective conditions. Take a slow walk around your property when dew is still on the ground but before your system has run. Areas with underground leaks tend to stay wet longer than the surrounding lawn. You might also notice unusually lush patches of grass that are benefiting from the extra water.
Sometimes, you can actually hear the leak if you get quiet enough—listen for a subtle hissing sound from pressurized water escaping. For more technical confirmation, attach a pressure gauge to your system and watch for unexpected drops when everything is turned off.
In particularly stubborn cases, we sometimes use food coloring in the water supply to trace leak pathways. If these DIY methods don’t work, don’t despair! Professional services (like ours) use specialized acoustic sensors or thermal imaging to pinpoint hidden leaks with minimal digging.
What tools should every homeowner keep on hand?
Every Cape Cod homeowner should have a basic irrigation repair kit ready for those unexpected sprinkler emergencies. Think of it as your sprinkler first-aid kit!
Replacement heads matching your specific system are absolute must-haves. Nothing’s more frustrating than finding a broken head on Saturday evening when supply stores are closed. Include a few spare nozzles for each type of head in your system as well—these tiny parts are easily damaged but simple to replace.
For pipe repairs, keep PVC primer and cement on hand (they work as a pair), along with Teflon tape for creating watertight threaded connections. A good pair of pipe cutters will give you clean cuts that ensure proper repairs, while compression couplings allow for quick fixes without extensive digging.
Don’t forget waterproof wire connectors for those occasional electrical repairs, and a small shovel or trowel for precision digging around delicate system components.
Having these items in your garage or shed means you can address small problems before they flood your yard or drain your wallet. One homeowner told us: “That $50 I spent on spare parts saved me a $300 emergency service call when a head broke right before my daughter’s graduation party!”
Will my warranty cover sprinkler leak repairs?
When it comes to warranties and sprinkler system leak repair, the answer isn’t always straightforward. Most standard home warranties don’t automatically cover irrigation systems—they’re typically considered an “exterior system” outside the basic coverage.
If your system was professionally installed within the last few years, check your paperwork. Most quality installations (including ours at Best Cape Cod Irrigation) come with a 1-3 year warranty on both parts and labor. This often covers unexpected leaks that aren’t caused by obvious external damage like lawnmower accidents.
Individual components often have their own protection. Controllers, valves, and premium sprinkler heads typically carry manufacturer warranties ranging from 1-5 years, even if your overall system warranty has expired.
Some homeowners are surprised to learn that home warranty companies often offer irrigation coverage as an add-on service. These typically cover major components but exclude normal wear and tear issues. It’s worth checking if this option is available to you.
At Best Cape Cod Irrigation, we stand firmly behind our work with comprehensive warranty coverage on both parts and labor for all new installations and repairs. We recommend keeping all your receipts and warranty information in a dedicated folder—you’ll thank yourself later when you need to reference them!
Proper maintenance is often a requirement to keep warranties valid. Those seasonal check-ups aren’t just good practice—they might be protecting your coverage too.
Conclusion
Let’s face it—that puddle forming in your yard isn’t just ruining your shoes. A leaking sprinkler system silently drains your wallet, threatens your carefully maintained landscape, and could even damage your home’s foundation over time. But after reading this guide, you’re now equipped to tackle those pesky sprinkler system leak repairs with confidence.
Think about what you’ve learned: how to spot those telltale signs of trouble, which tools to keep in your garage, and the step-by-step techniques that turn a daunting repair into a satisfying Saturday project. Most importantly, you now know when to roll up your sleeves and when to call in the cavalry.
Here on Cape Cod, water conservation takes on special importance. Our unique coastal environment and sandy soil create specific irrigation challenges that many off-the-shelf solutions don’t address. Every leak you fix isn’t just saving you money—it’s protecting our local water resources for generations to come.
There’s something deeply satisfying about fixing a problem with your own two hands. As one of our customers recently told us after repairing her own sprinkler head, “I feel like I’ve taken back control of my yard!” That’s exactly the empowerment we hope this guide provides.
Of course, not every repair goes smoothly, and that’s perfectly okay. After 25 years of serving Cape Cod’s irrigation needs from Falmouth to Provincetown, we’ve seen it all—and fixed it all. Our team at Best Cape Cod Irrigation understands the unique challenges of local systems and soils in a way that only comes with decades of hands-on experience.
Whether you’re tackling repairs yourself or need professional assistance, we’re just a phone call away with advice, parts, and service. For more comprehensive information about our full range of irrigation services, visit our Irrigation Repairs & Maintenance page.
Your lawn deserves to be lush and healthy without wasting water or money. Don’t let leaks drain your resources—take action today to keep your sprinkler system running efficiently for years to come. Your wallet (and your water bill) will thank you.
