



The Foundation of a Lush Landscape
An irrigation pipe installation is the foundation of a healthy, vibrant landscape, ensuring your lawn and garden get the water they need efficiently. Manual watering can be a chore, especially on Cape Cod, and often leads to waste; up to 50% of the 9 billion gallons of water used for outdoor irrigation daily in the U.S. is lost to inefficiency.
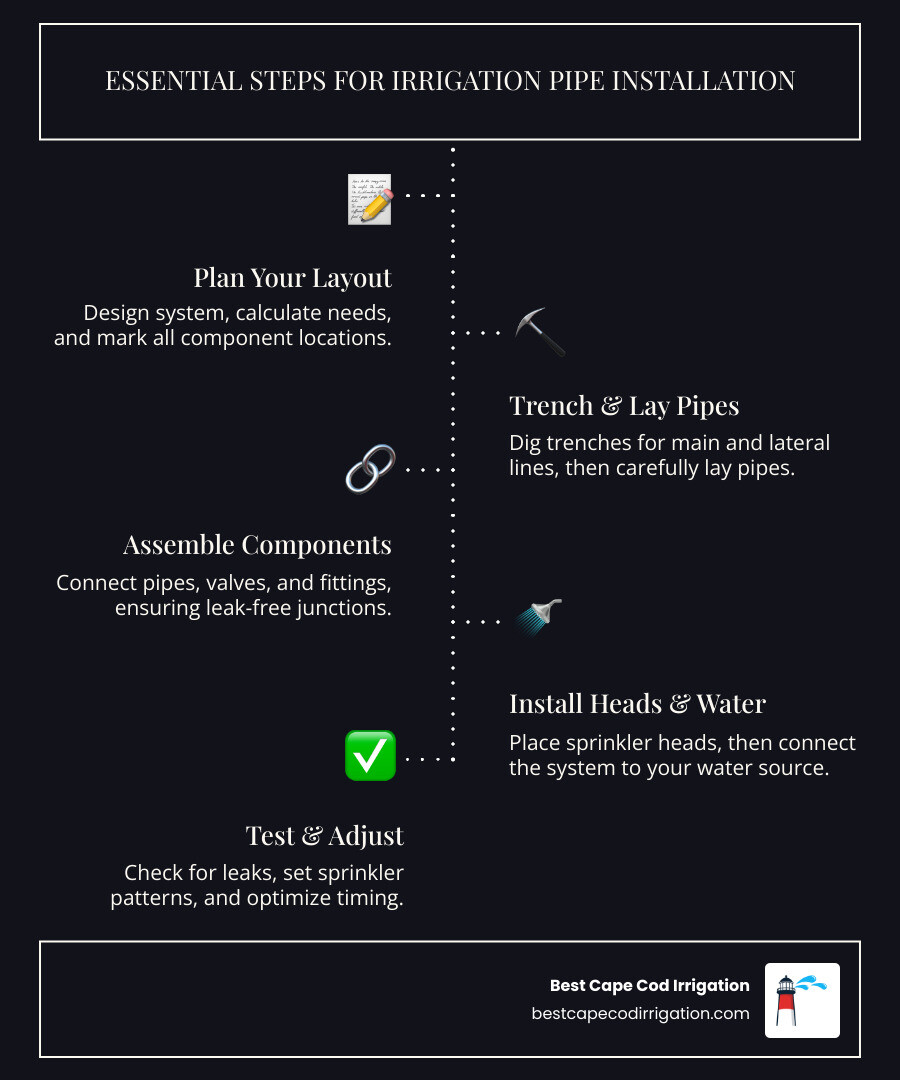
A well-installed system saves time, conserves water, and keeps your landscape lush by delivering the right amount of water directly where it’s needed. Here’s a quick overview of the essential steps involved:
- Plan Your Layout: Design where pipes and sprinklers will go.
- Dig Trenches: Create paths for your underground pipes.
- Lay Pipes: Install main and lateral lines.
- Connect Components: Assemble valves, fittings, and pipes.
- Install Sprinkler Heads: Place and connect your watering devices.
- Connect to Water Source: Link the system to your home’s water supply.
- Test and Adjust: Ensure everything works perfectly.
This guide will walk you through everything from planning to testing your new system.
Irrigation pipe installation terms to learn:
Planning Your System: The Blueprint for Success
Proper planning is the blueprint for an efficient system that conserves water and promotes a healthy garden. Start by assessing your garden’s layout, water source location, and plant watering needs. Grouping plants with similar needs simplifies the design.
Next, determine your water pressure (PSI) and flow rate (GPM). Pressure, typically 40 to 65 PSI for homes, dictates spray distance. Flow rate determines how much water your system can deliver. To find your GPM, time how long it takes to fill a 5-gallon bucket from an outdoor spigot, then divide 5 by the time in seconds and multiply by 60. These numbers are crucial for selecting the right pipe sizes and sprinkler heads.
Zoning your system by dividing your garden into areas based on sun exposure, plant type, and soil (clay, loam, or sandy) allows for customized watering schedules. This prevents overwatering a shady flower bed while a sunny lawn gets what it needs. Finally, always check with your local water authority for specific rules on irrigation pipe installation, such as requirements for backflow prevention devices.
Check with your local water authority for any irrigation system regulations
Choosing Your System and Pipe
For irrigation pipe installation, you’ll choose between in-ground sprinklers, soaker hoses, or drip irrigation.
- In-ground sprinkler systems are ideal for even coverage on large lawns.
- Soaker hoses work well for garden beds and hedges.
- Drip irrigation systems are the most efficient, delivering water directly to plant bases, which is perfect for vegetable gardens and flower beds.
The two most common pipe materials are Polyethylene (Poly) and Polyvinyl Chloride (PVC).
| Feature | Polyethylene (Poly) Pipe | PVC Pipe |
|---|---|---|
| Flexibility | Very flexible, bends around curves and handles ground shifts. | Rigid and less forgiving with ground movement. |
| Durability | Excellent resistance to freezing and less likely to burst. | Strong, but can crack or break when water freezes inside. |
| Installation | Uses clamps, which can be easier for DIY projects. | Uses primer and solvent cement, requiring precise work. |
| Cost | Generally comparable to PVC. | Often slightly less expensive for the pipe itself. |
| Freeze Resistance | Excellent. Can be buried shallower (around 6 inches) as it handles freezing well. | Poor. Must be buried deeper (18 inches or below the frost line) to protect from freezing. |
For colder climates like Cape Cod, Poly pipe’s freeze resistance is a significant advantage, allowing for shallower trenches.
Mapping and Layout
Create a detailed map of your property on graph paper, drawn to scale. Mark your water source, house, landscape features, and any obstacles. Plan your sprinkler head locations using the “head-to-head” coverage rule: each sprinkler’s spray should reach the next sprinkler to ensure even watering and prevent dry spots.
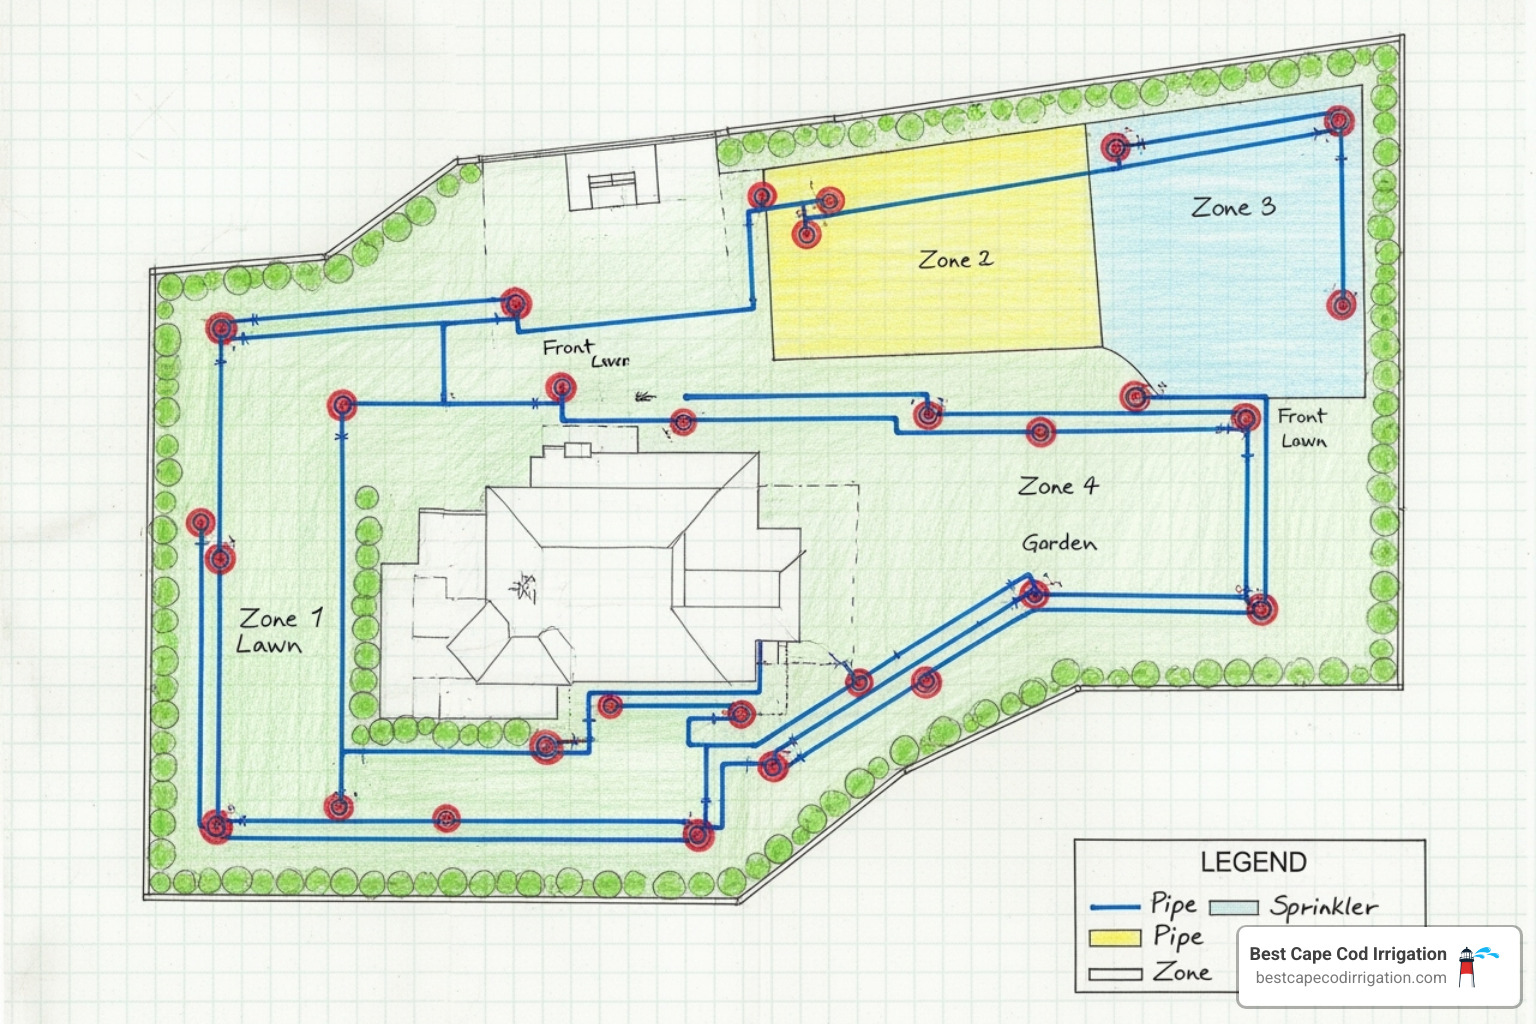
Next, sketch the most direct pipe routes possible. Minimizing turns and fittings helps maintain water pressure for optimal system performance.
Essential Safety for Your Irrigation Pipe Installation
Safety is essential for any digging project. Before you start, take these critical steps:
Call 811 before you dig to locate underground utilities
This free service marks buried gas, power, and cable lines to prevent dangerous and expensive accidents. Always hand-dig carefully around marked utilities.
Wear personal protective equipment (PPE), including sturdy gloves, appropriate clothing, and robust footwear. When using power tools like a trencher, safety glasses and hearing protection are mandatory.
For electrical safety, always turn off power to the controller before making wire connections. Mark your trench areas clearly and backfill them the same day if possible to prevent accidents. Be aware of overhead power lines, keeping all equipment and long pipes at least 10 feet away.
Gathering Your Tools and Materials
Having the right tools and materials makes your irrigation pipe installation much smoother. Many essential items are readily available for the DIY enthusiast.
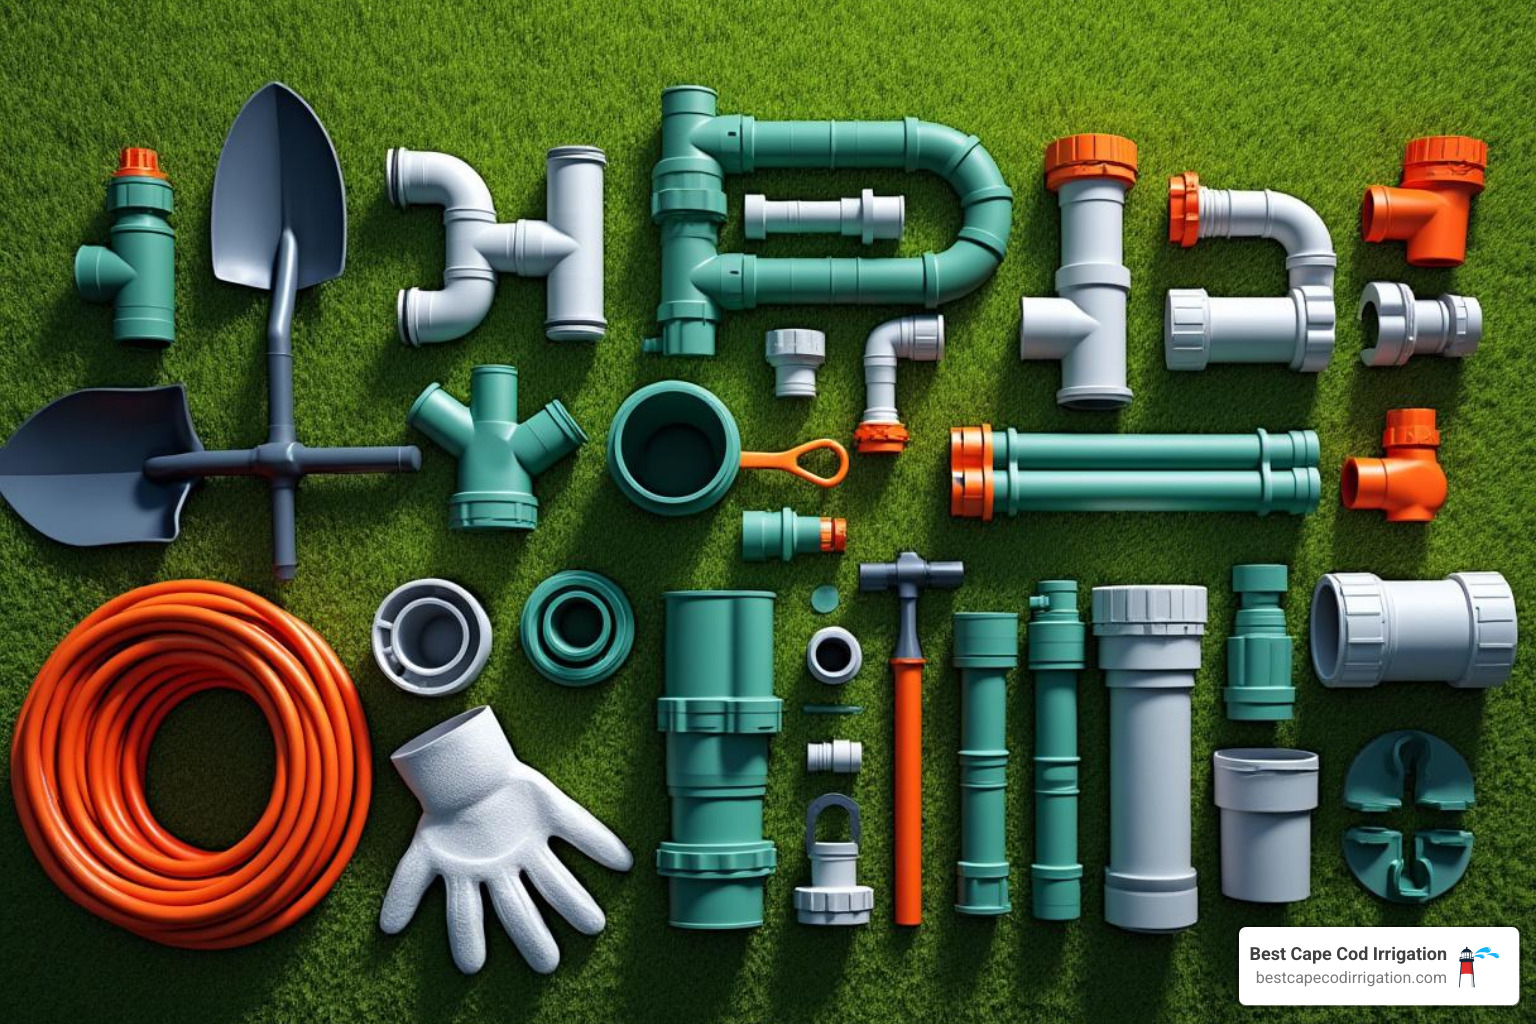
For digging, you’ll need a shovel or spade for precision work, but consider renting a trencher or vibratory plow for larger projects. You’ll also need a Poly Pipe Cutter or PVC Pipe Cutter (a hacksaw also works for PVC), a mallet, wire strippers, and a multimeter for electrical work. Other essential tools include a measuring tape, utility knife, level, flags or stakes for marking, and possibly boring rods for going under sidewalks.
Your material list will include pipes (Poly or PVC), typically in 1-inch or 3/4-inch diameter, and compatible fittings (T-connectors, elbows, couplings). You’ll need sprinkler heads (pop-up, rotors, etc.) suited to your garden, valves and valve boxes for each zone, and a controller or timer. For wiring, use waterproof wire connectors and low-voltage direct-burial wire. A backflow preventer is a critical safety component required by code, and a dedicated shut-off valve is highly recommended. Finally, have PVC primer and cement or Poly Pipe Clamps on hand, along with Teflon tape for threaded connections and duct tape to keep pipes clean during installation.
Choosing the Right Pipe for Your Irrigation Pipe Installation
For most residential systems, you’ll use 1-inch or 3/4-inch pipe diameters, depending on your flow rate and the number of sprinkler heads per zone. While PVC pipe is often Schedule 40 (a durable gauge), polyethylene pipe is ideal for areas with cold winters like Cape Cod due to its flexibility.
Connecting PVC requires primer and cement for a permanent bond. Poly pipe uses clamps and barb fittings. For main lines, we recommend double-clamping connections with crimp rings for added security.
A game-changer for connecting sprinkler heads is “funny pipe” (or swing pipe). This flexible, corrugated pipe connects the lateral line to the sprinkler head, allowing for easy adjustments and absorbing impacts, which helps prevent breakage.
Understanding System Costs
The cost of an irrigation pipe installation varies depending on whether you do it yourself or hire a professional.
Based on internet data, the cost of a full residential irrigation system can range from $500 for basic DIY setups to $5,000 or more for professional installations in larger gardens. These are average costs based on internet data and not actual costs for Best Cape Cod Irrigation services. Professional installations for complex systems can easily exceed this range, with the high end being at least three times the average.
While DIY can save money, it’s a significant time commitment. A professional crew might finish in a day or two, whereas a DIY project can take weeks of physically demanding labor, especially trenching. Tool rental costs for DIYers can also add up; a trencher might rent for around $88 per day. For many homeowners, the expertise and peace of mind of a professional installation is a worthwhile investment.
More info about Professional Sprinkler Installation
Step-by-Step Guide to Irrigation Pipe Installation
Now it’s time for the physical process of your irrigation pipe installation, where your planning comes to life. This section details the process from digging trenches to connecting the final components.
Step 1: Trenching and Pipe Laying
Trenching is the most labor-intensive step. You have several options:
- Shovel: Best for small systems, tight spaces, and digging around marked utilities.
- Trencher: A walk-behind trencher, available at rental stores, is a time-saver for larger projects.
- Vibratory Plow: A professional method that pulls pipe underground with minimal lawn disturbance.
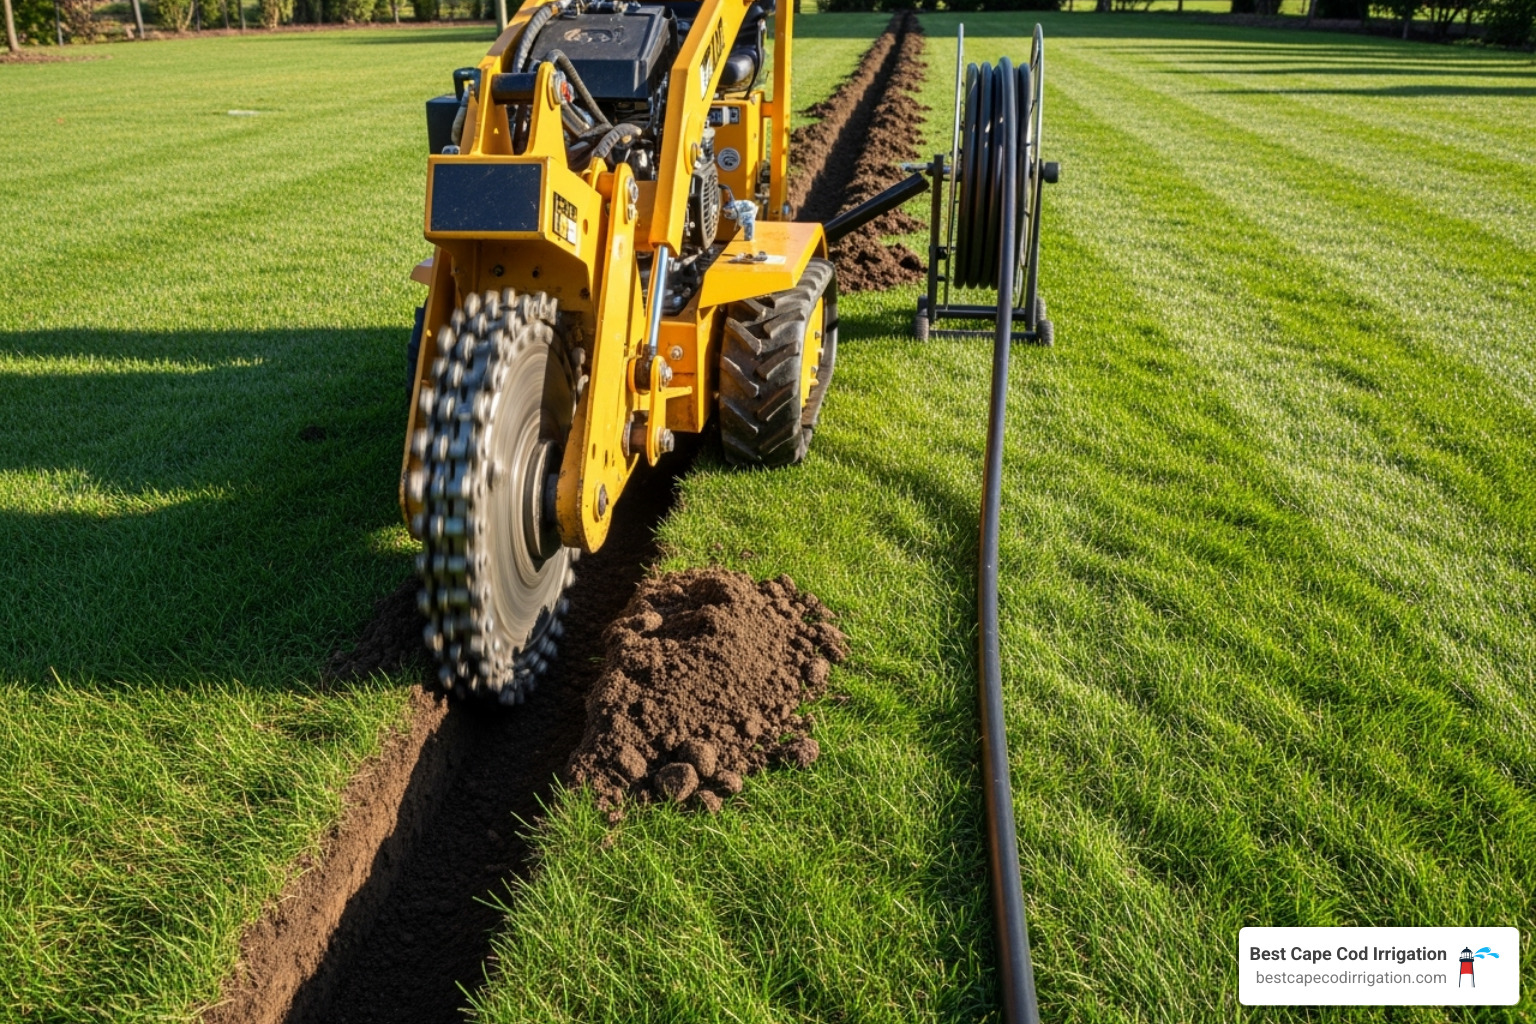
Aim for a trench depth of 6 to 12 inches. Main lines may go 10 to 12 inches deep, while lateral lines can be 6 to 8 inches. If using PVC in a cold climate, you may need to dig below the frost line (18+ inches) to prevent freezing. A pro tip is to remove sod in strips so you can replace it easily after backfilling.
To get under a sidewalk, you can “bore” by using water pressure from a garden hose attached to a PVC pipe or by renting specialized boring tools. As you lay pipe, keep the ends covered with duct tape to prevent debris from getting inside.
Step 2: Assembling Manifolds and Connecting Pipes
The valve manifold, an assembly of your zone valves, is the heart of the system. Assemble it first in a valve box, leaving space between valves for future maintenance.
Pipe connection methods vary by type:
- For PVC Pipe: Apply PVC primer to the outside of the pipe and inside of the fitting. Quickly follow with PVC cement on both surfaces, push the pipe into the fitting with a quarter-turn, and hold firmly for a few seconds to create a permanent bond.
- For Poly Pipe: Slide a clamp over the pipe, push the barb fitting in completely, then position and tighten the clamp over the barb. We recommend double-clamping main line connections for extra security.
If you run into issues, you can find more info about Irrigation PVC Pipe Repair Service.
Step 3: Installing Sprinkler Heads and Valves
With your lines in place, it’s time to connect your sprinkler heads and valves.
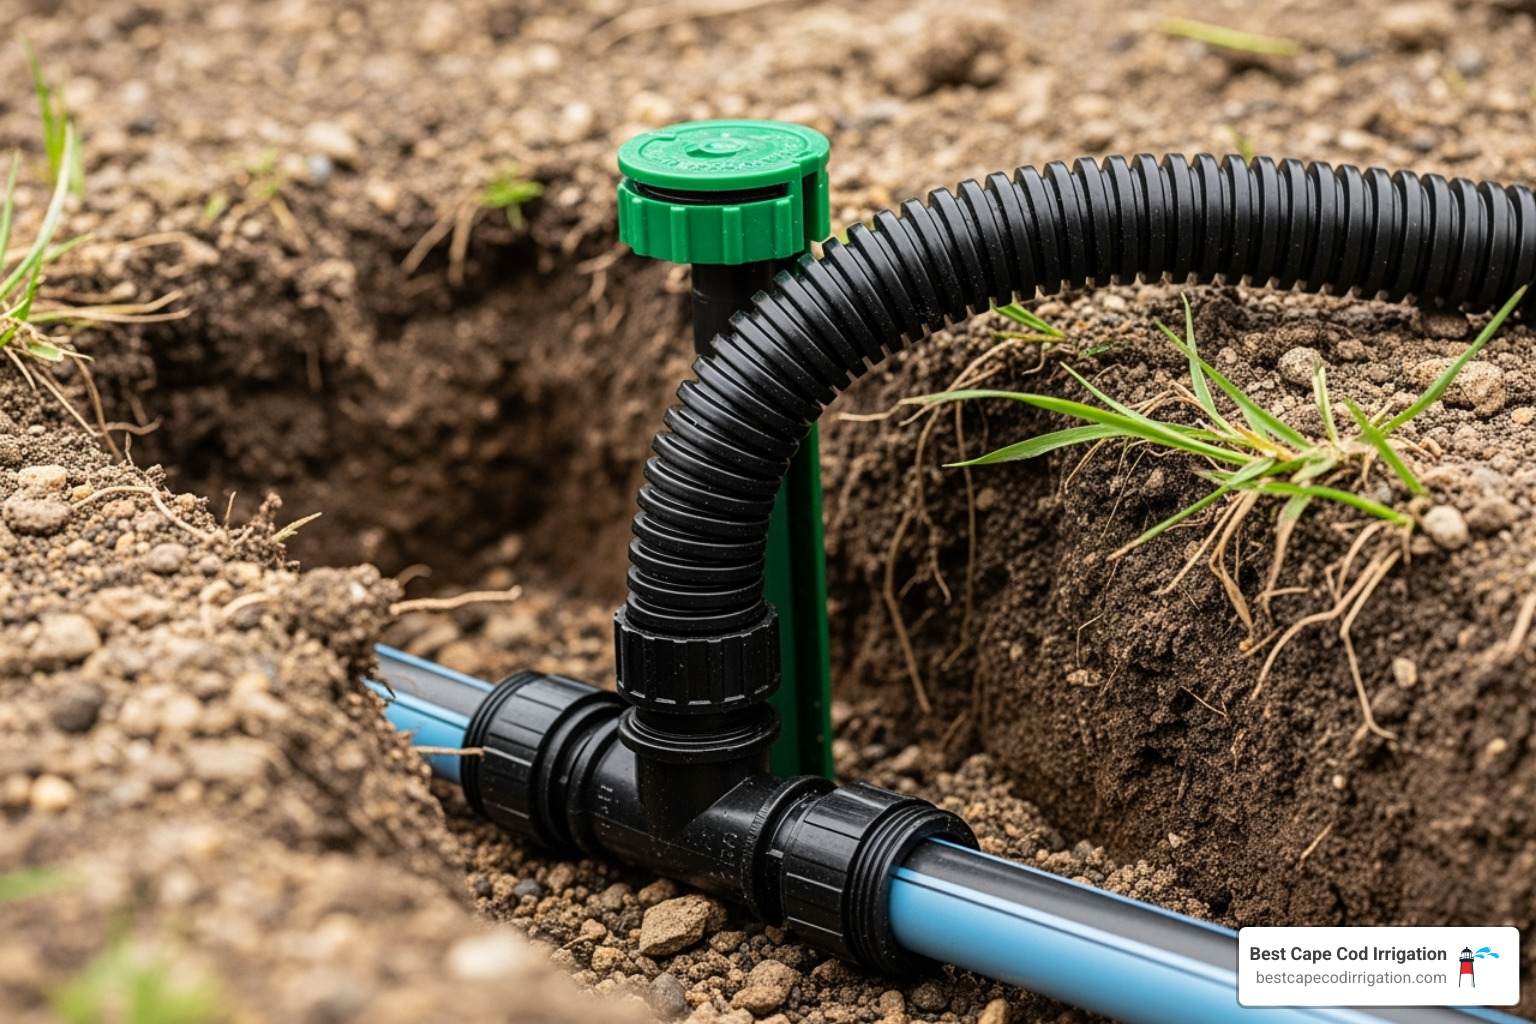
We recommend using “funny pipe” (swing pipe) to connect sprinkler heads to the lateral lines. This flexible pipe allows for precise positioning and absorbs impacts, preventing breakage. You can use self-tapping saddles to connect the funny pipe to your lateral line.
Next, wire your zone valves to the controller. Each valve has a common wire (usually white, connecting to all valves) and a dedicated zone wire. Use waterproof connectors rated for direct burial inside the valve box to protect connections from moisture and corrosion.
Step 4: Connecting to Water and Backflow Prevention
The final plumbing step is connecting the system to your home’s water supply, often by tapping into an outdoor spigot or the main service line. We recommend installing a dedicated shut-off valve right after the connection point for easy maintenance and winterization.
The most critical component is the backflow preventer, which is required by most local codes. This device prevents irrigation water from contaminating your home’s drinking water. Installation requirements vary by location, so ensure you meet all local codes. For connecting to the main water supply and installing the backflow preventer, we suggest hiring a licensed plumber to ensure it’s done safely and correctly.
Finalizing Your System: Testing, Maintenance, and Winterizing
With the physical installation complete, the final phase involves testing, adjusting, and preparing for long-term maintenance to ensure your irrigation pipe installation runs efficiently for years.
Testing and Adjusting Your New System
Before attaching sprinkler heads, flush the system by running water through each zone for a few minutes to clear out any debris. After flushing, attach the heads. Turn on each zone individually to check for leaks at all connections. Fine-tune each sprinkler head by adjusting its spray pattern, distance, and arc to achieve “head-to-head” coverage, ensuring no dry spots.
Finally, program your controller. We recommend watering in the early morning to minimize evaporation and encourage deep root growth. Consider a smart controller that adjusts schedules based on weather data, which can save significant amounts of water.
Long-Term Maintenance and Repairs
Regularly inspect your system while it’s running. Look for pooling water, damp spots, or changes in pressure, which can indicate a leak. Promptly repairing leaks saves water and prevents larger problems. Periodically clean filters and sprinkler heads to prevent clogs. As your landscape grows, you may need to adjust head placement for optimal coverage. If you face a stubborn leak, professional help is available.
More info about Irrigation Pipe Leak Repair
Winterizing Your System in Colder Climates
In colder climates like Cape Cod, winterizing your irrigation system is essential. Water left in pipes can freeze and expand, causing them to crack or burst, leading to costly spring repairs.
The most effective method is the “blow-out,” which uses an air compressor (50-100 PSI) to force all water out of the lines. Before starting, turn off your controller and ensure the backflow preventer is drained or protected according to manufacturer instructions and local codes. For larger systems or if you’re uncomfortable using an air compressor, hiring a professional for winterization is a smart choice. Best Cape Cod Irrigation can handle this for you, ensuring your system is protected all winter.
Frequently Asked Questions about Irrigation Installation
Here are answers to common questions about irrigation pipe installation.
How deep should irrigation pipe be buried?
The required depth depends on your pipe type and local climate. Rigid PVC pipe, which can crack in freezing temperatures, is often buried deeper (around 18 inches or below the frost line). Flexible black poly pipe is more forgiving and can be buried shallower, typically 6 to 12 inches deep, which protects it from surface damage. Always check local building codes for specific requirements in your area.
What are the biggest challenges of a DIY irrigation pipe installation?
The biggest challenges of a DIY project are the intense physical labor of trenching, the technical precision required for water pressure calculations to ensure even coverage, and creating leak-free connections. Additionally, navigating local regulations and plumbing codes for components like backflow preventers can be a significant hurdle for those without experience.
Can I mix different types of sprinkler heads in the same zone?
We strongly recommend against mixing different types of sprinkler heads (e.g., rotary and spray heads) in the same zone. Different head types have different “precipitation rates,” meaning they apply water at different speeds. Mixing them leads to inefficient watering, with some areas being overwatered while others remain dry. This wastes water and can harm your landscape. For best results, use heads with matched precipitation rates within each zone.
Conclusion
An irrigation pipe installation is a rewarding project that transforms your landscape, conserves water, and saves money. Success hinges on proper planning, careful execution, and ongoing maintenance. While the DIY route is an option, it requires significant time and effort.
For a professional, hassle-free system designed specifically for Cape Cod’s unique climate and soil, we’re here to help. At Best Cape Cod Irrigation, we bring over 25 years of regional expertise to every project. That means you get an efficient, reliable system that truly understands your home and provides worry-free watering for years to come.
Ready to take the next step towards a lush, healthy lawn without the stress?
Schedule your professional irrigation installation today!
