Why Quick Irrigation Pipe Leak Repair Saves Water and Money
Irrigation pipe leak repair is a critical skill every Cape Cod homeowner should master. A small leak in your sprinkler line can waste hundreds of gallons of water per month if left unrepaired, turning your eco-friendly lawn care into an environmental and financial nightmare.
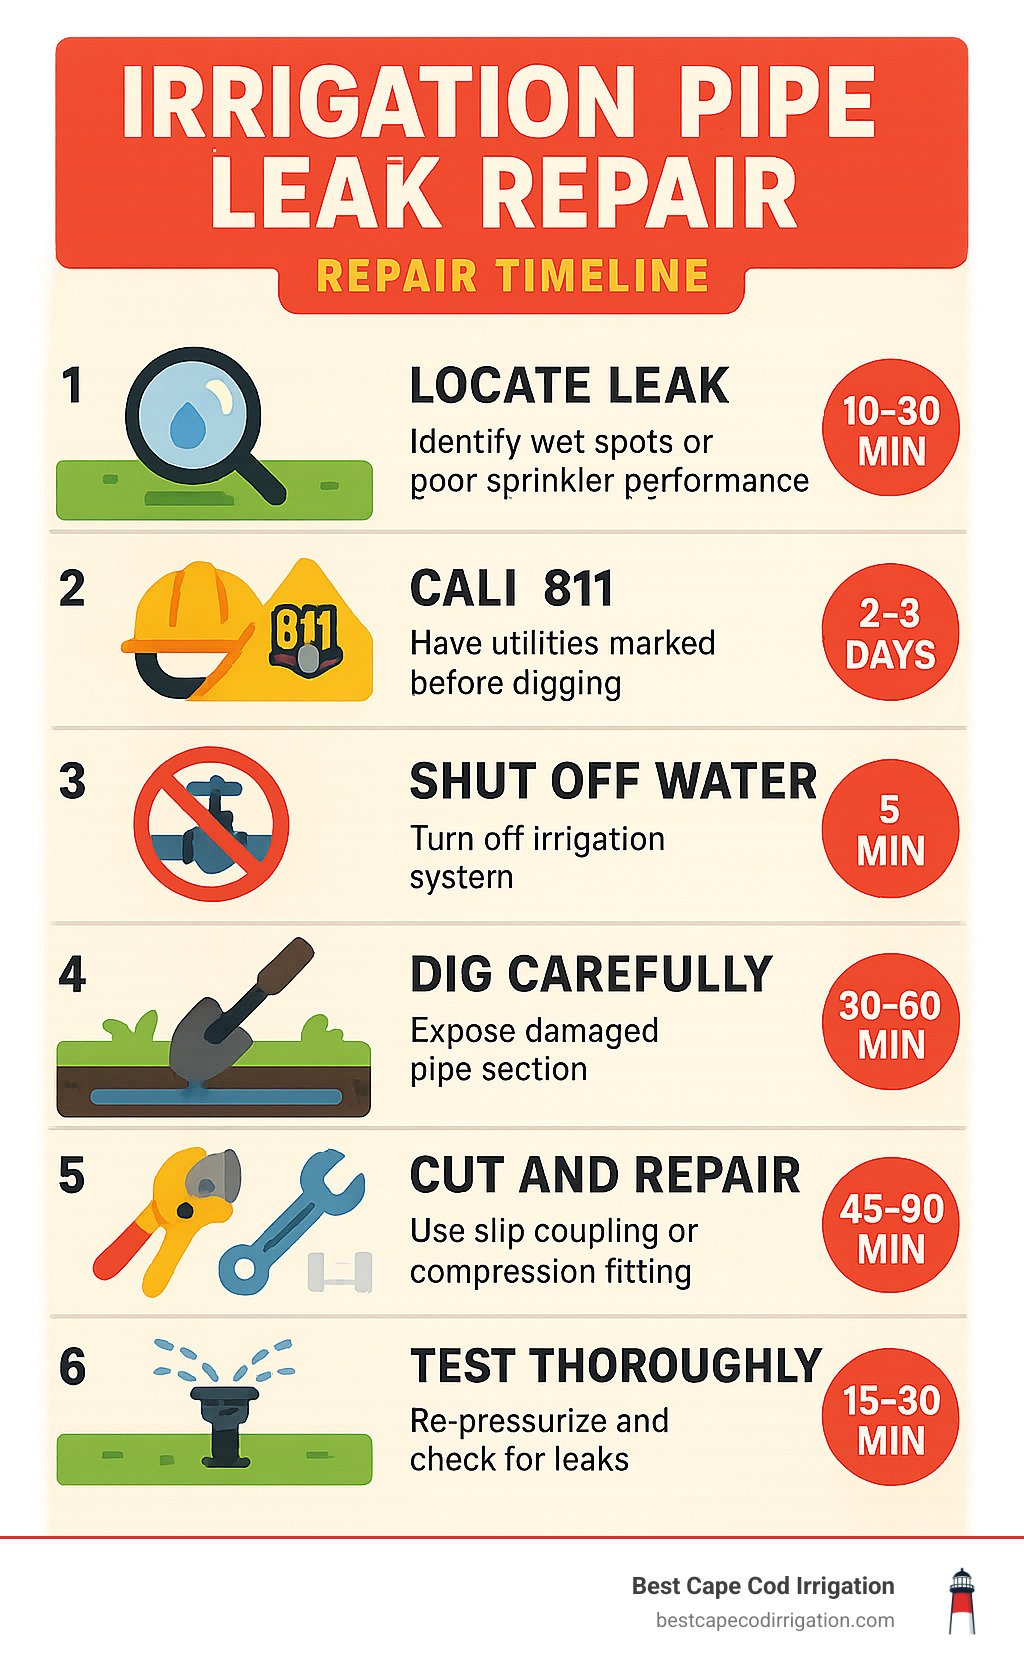
Quick Irrigation Pipe Leak Repair Steps:
1. Locate the leak – Look for wet spots, bubbling soil, or underperforming sprinkler heads
2. Call 811 – Have utilities marked before digging (wait 2-3 days)
3. Shut off water – Turn off irrigation system and depressurize the line
4. Dig carefully – Expose 6-12 inches around the damaged pipe section
5. Cut and repair – Remove damaged section, install slip coupling or compression fitting
6. Test thoroughly – Re-pressurize system and check for leaks before backfilling
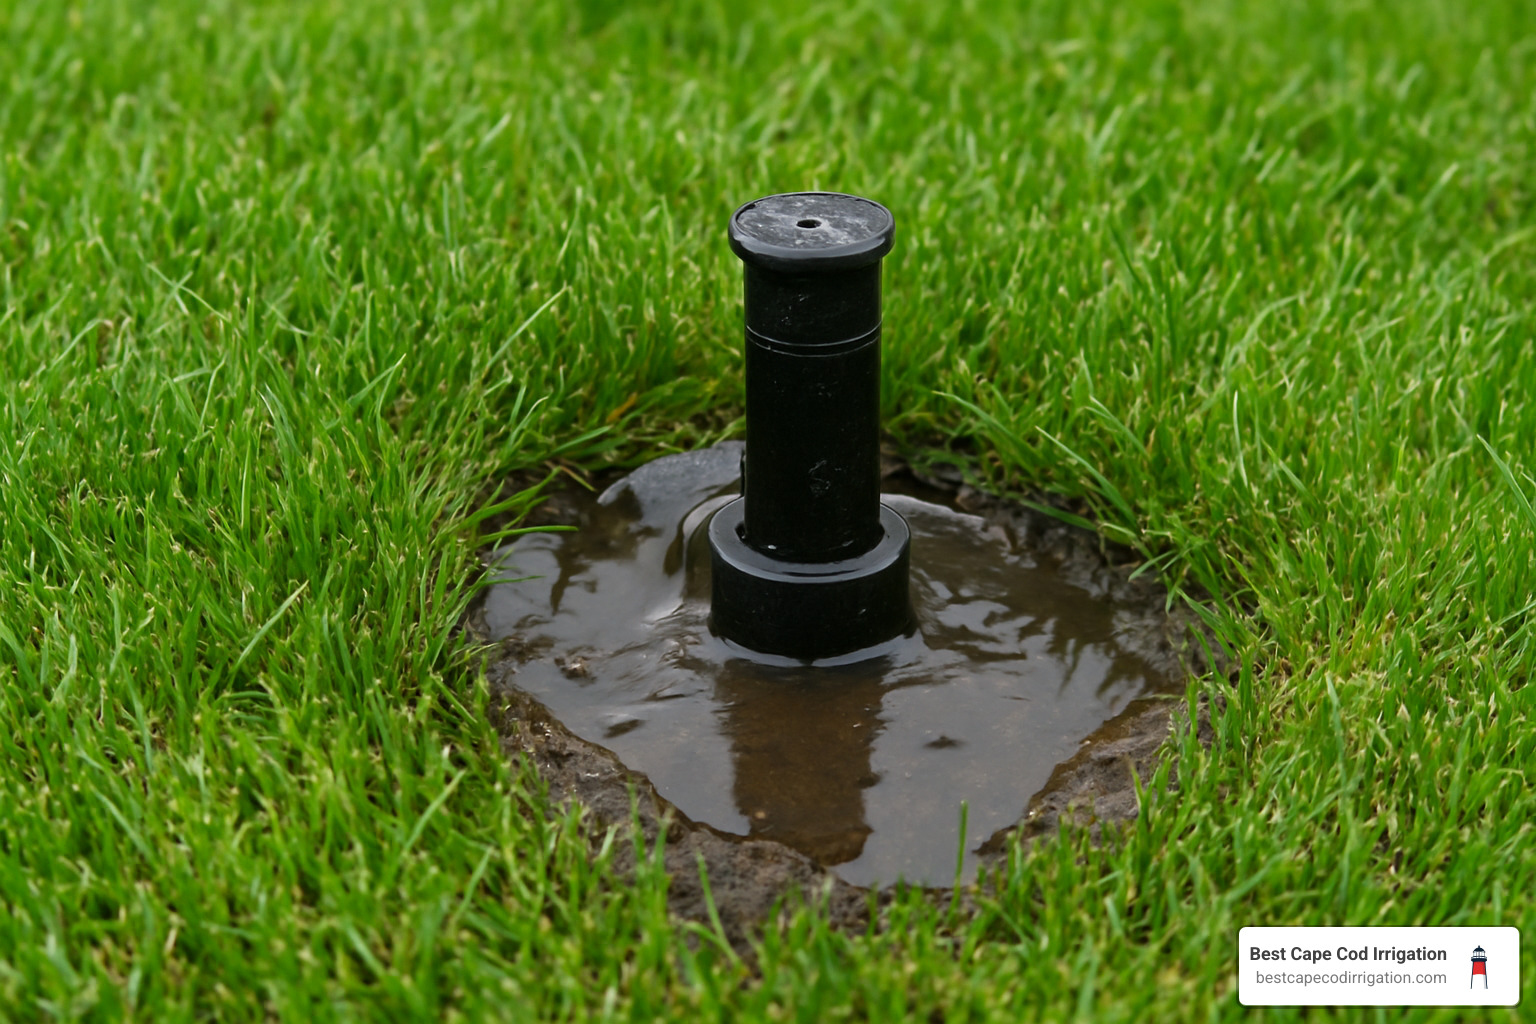
Ever had that sinking feeling when you notice a puddle in your yard despite no rain? That’s often the first sign of a broken irrigation pipe. The good news: most repairs take just 2-4 hours and cost only $40-$70 in materials for a typical DIY fix.
Cape Cod’s sandy soil and freeze-thaw cycles make irrigation leaks more common than in other regions. Tree roots, lawn equipment damage, and winter frost are the usual culprits. But with the right approach, you can stop the drip and restore your system’s efficiency quickly.
A typical damaged irrigation pipe repair might seem daunting, but it’s actually one of the more straightforward home maintenance tasks. Whether you’re dealing with PVC schedule 40 pipe or flexible polyethylene tubing, the basic repair process remains consistent across different materials.
How to Detect a Hidden Leak
The trickiest part of irrigation pipe leak repair often isn’t the actual fixing—it’s finding where the problem is hiding underground. Water has a sneaky way of traveling through Cape Cod’s sandy soil, making wet spots appear far from the actual leak source. We’ve seen cases where water follows old root channels or natural drainage paths, bubbling up 10-15 feet away from where the pipe actually broke.
Think of yourself as a water detective. The best approach is to run each irrigation zone individually while you walk your property with a keen eye. You’re looking for clues that don’t quite fit the normal pattern.
Wet spots or puddles in areas that should be bone dry are obvious red flags. But also watch for bubbling soil that looks like tiny geysers trying to break through. Sometimes you’ll notice unusually green patches of grass getting an extra drink, or underperforming sprinkler heads that seem weaker than usual in a specific zone.
Don’t forget to check your water bill for sudden spikes—that monthly statement often provides the first hint that something’s wrong underground.
Quick At-Home Tests
Before you grab a shovel, try these simple detective methods that can save you hours of unnecessary digging.
The bucket test approach starts with your water meter. Turn off everything in your house that uses water, then check if the meter’s low-flow indicator is still moving. If it’s spinning when your irrigation system is off, you’ve got a leak somewhere in the lines.
Next, take a valve-box check tour around your yard. Pop open each valve box and peek inside for standing water. A flooded valve box often means trouble with the solenoid valve or nearby piping—it’s like finding a smoking gun at a crime scene.
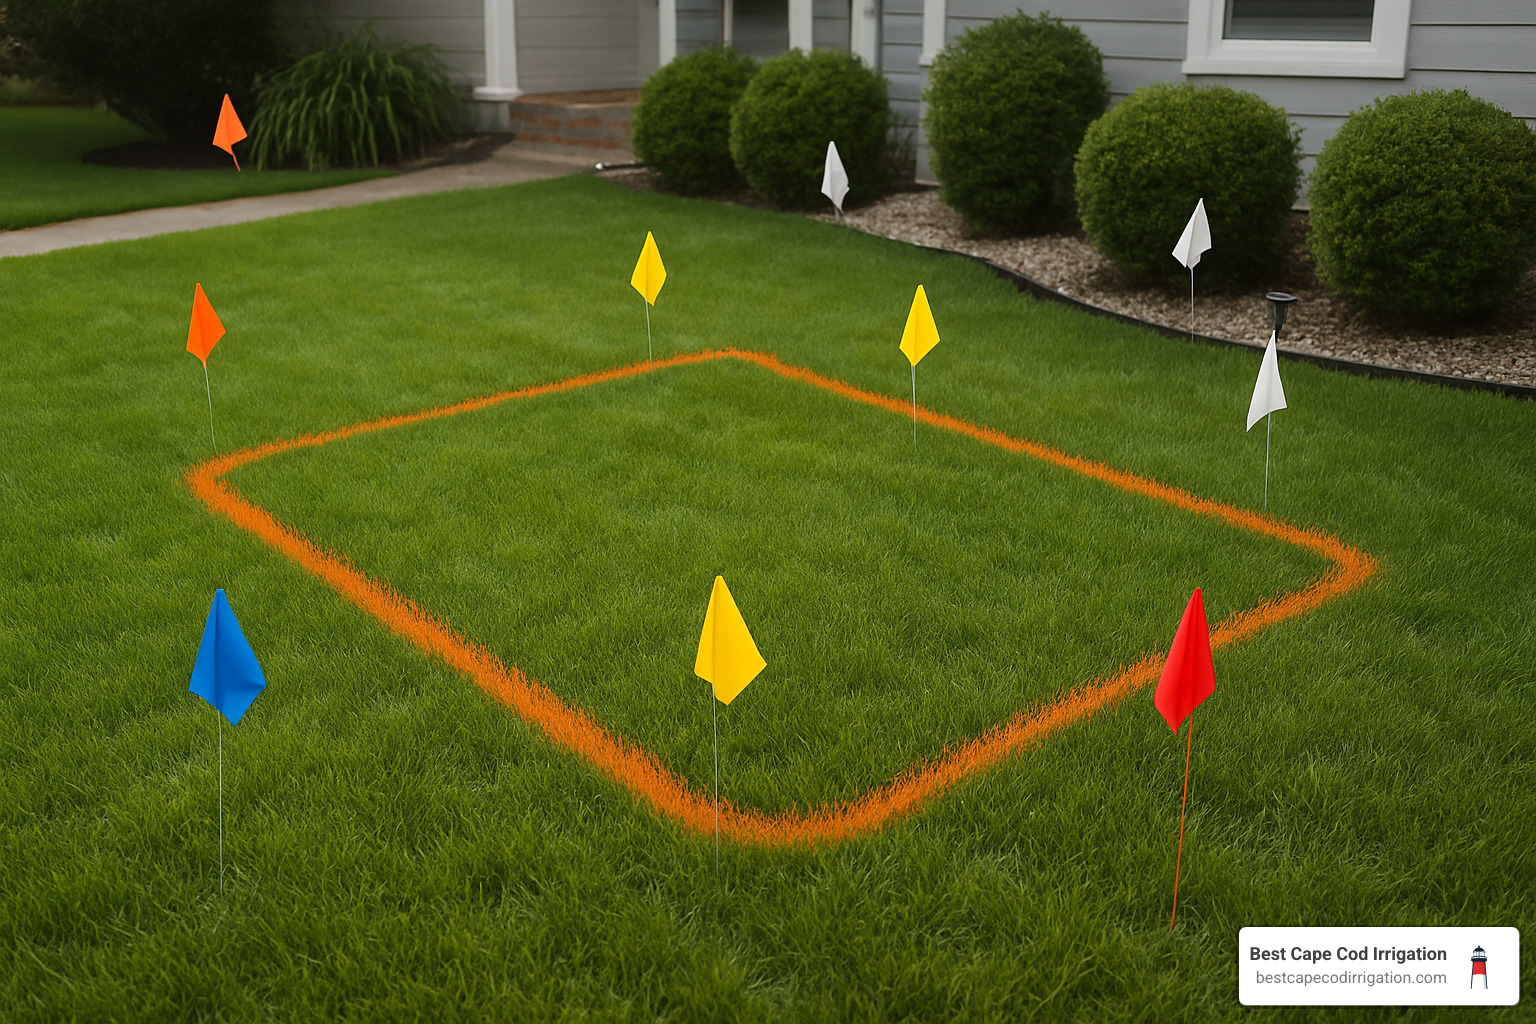
For the zone isolation method, run each irrigation zone separately for 10-15 minutes while you patrol the area. Bring some small flags to mark any suspicious wet spots you find. This systematic approach helps you narrow down which zone has the problem.
Advanced Leak-Finding Tools
When the leak is playing hard to get, it’s time to bring in the big guns. Professional-grade tools can pinpoint problems that basic observation might miss.
Acoustic sensors are like stethoscopes for your irrigation system. These clever devices pick up the sound of water escaping from pressurized pipes, even when they’re buried several feet deep. Scientific research on acoustic leak detection shows they’re remarkably effective at finding exact leak locations without guesswork.
A pressure gauge test involves isolating sections of your irrigation system and watching for pressure drops over time. If you see a loss of 5 psi or less over 30 seconds, you’re likely dealing with a manageable leak. Larger pressure losses usually mean major pipe failure that might need professional attention.
Some irrigation pros even use thermal cameras to spot temperature differences in the soil caused by leaking water. It’s high-tech detective work that can save hours of exploratory digging in the wrong spots.
Safety Prep Before You Dig
Before you grab that shovel, Cape Cod’s underground utilities can turn a simple repair into a dangerous—and expensive—disaster. We always tell our customers: “Call before you dig, every single time.”
Call 811 at least 2-3 days before starting your project. This free service will have utility companies mark gas lines, electrical cables, water mains, and communication lines on your property. Trust us—hitting a gas line while fixing a sprinkler leak is nobody’s idea of a good weekend project.
Essential Safety Gear:
– Work gloves to protect your hands
– Safety glasses (soil and debris can fly)
– Knee pads for comfort during the repair
– First aid kit nearby
Digging Guidelines:
– Use a hand trowel near marked utilities
– Dig “surgically”—small, careful cuts to avoid damaging other pipes
– Expose pipe 6 inches on each side of the suspected leak
– Dig at least 3 inches below the pipe for working room
More info about Irrigation Installation
Checklist Before Starting
System Shutdown:
– Turn off irrigation controller
– Locate and close the main irrigation shutoff valve
– Open drain valves to depressurize the system
– Wait 10-15 minutes for pressure to fully release
Tool Assembly:
– PVC pipe cutters or hacksaw
– Measuring tape
– Replacement pipe section
– Appropriate fittings (slip coupling, compression sleeve, or barbed connectors)
– PVC primer and cement (for PVC repairs)
– Hose clamps (for polyethylene repairs)
– Clean rags
– Bucket for bailing water from the excavation
Remember the golden rule: “Measure twice, cut once.” Nothing’s more frustrating than cutting your replacement pipe too short and having to make another trip to the hardware store.
Irrigation Pipe Leak Repair: Step-by-Step Fix
Now comes the satisfying part—actually fixing that pesky leak! Don’t let the technical details intimidate you. Whether you’re dealing with PVC or polyethylene pipe, the repair process is surprisingly straightforward once you know which method to use.
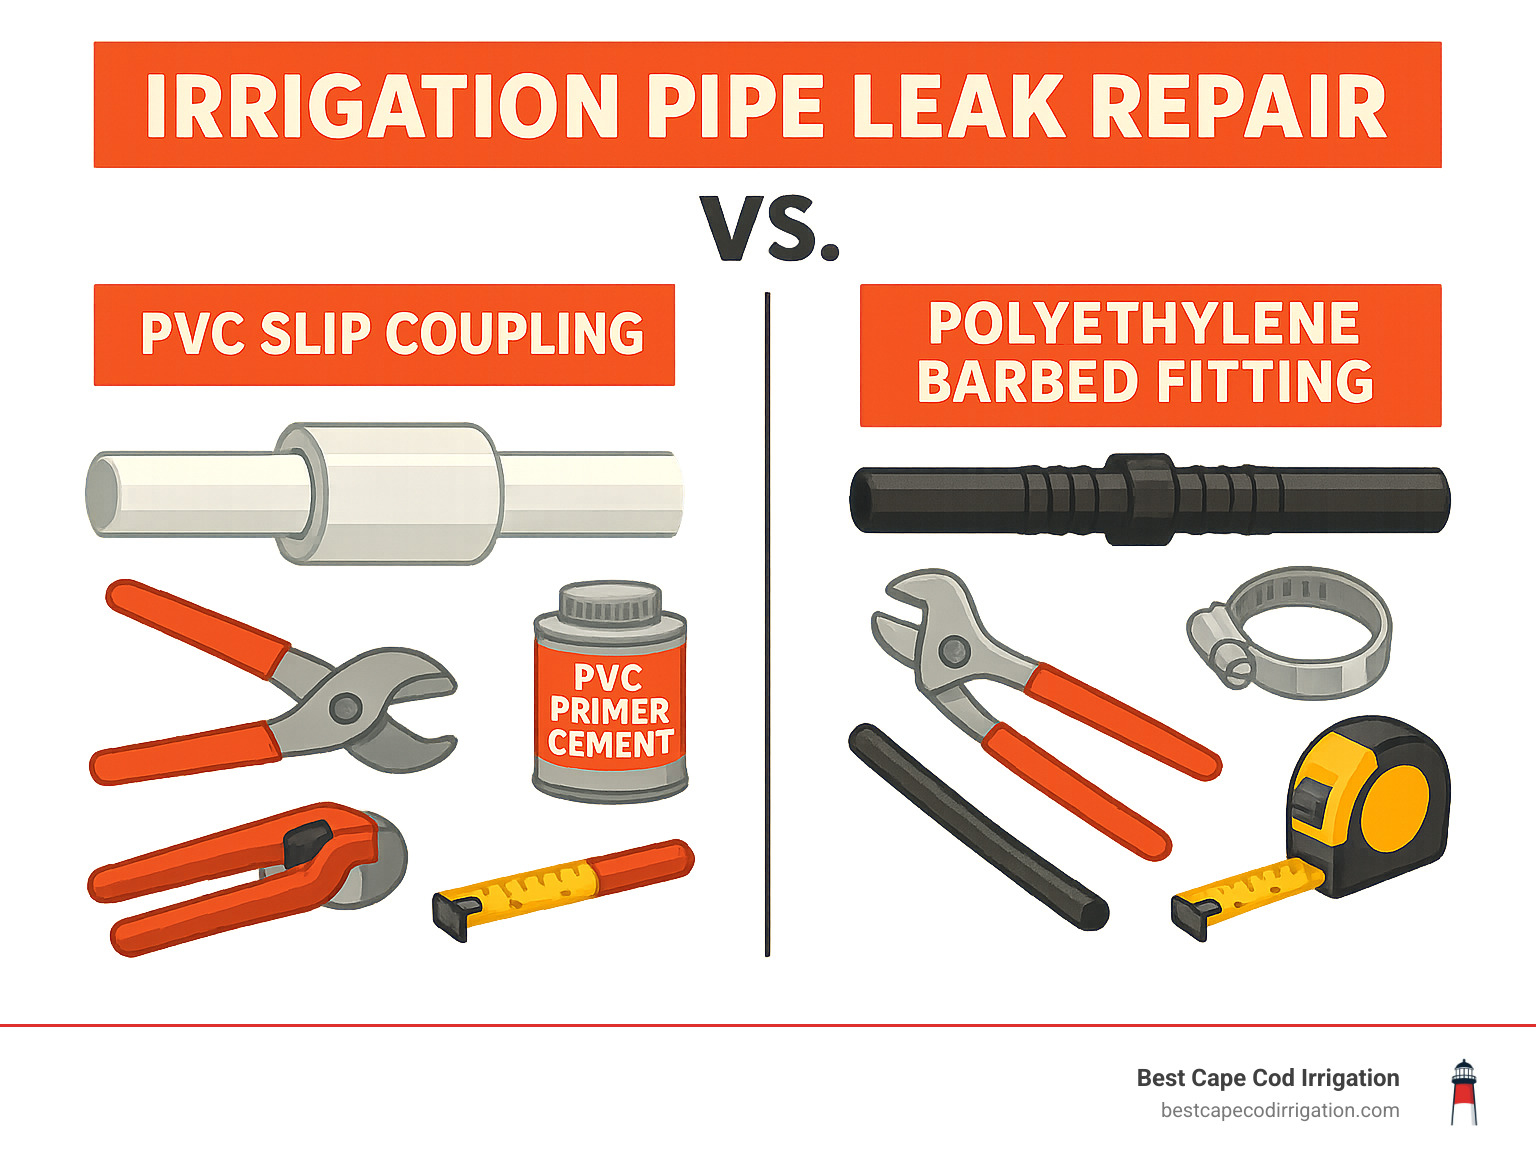
The key difference is simple: PVC pipes (those white or gray rigid pipes) need slip couplings with primer and cement, while polyethylene pipes (the black flexible tubing) use barbed fittings secured with hose clamps. If you want a universal solution that works for both, compression sleeves offer a no-glue option that’s perfect for nervous first-timers.
Tools & Materials for Irrigation Pipe Leak Repair
Getting the right tools makes all the difference between a smooth repair and a frustrating afternoon. Pipe cutters are worth every penny—they create much cleaner cuts than a hacksaw and make your job infinitely easier. You’ll also need channel lock pliers for tightening clamps, a measuring tape to ensure proper fit, and plenty of clean rags because this job can get messy.
For materials, grab a replacement pipe section that matches your existing diameter, along with the appropriate coupling for your pipe type. PVC repairs require primer and cement (don’t skip the primer—it’s not optional!), while polyethylene repairs need barbed couplings and quality hose clamps.
Based on internet data, most homeowners spend $40-$70 on materials for a typical DIY irrigation pipe leak repair. Professional repairs can range from $125 to $500+ depending on complexity, location, and local rates—quite a savings when you tackle it yourself!
More info about Irrigation Repairs & Maintenance
Exposing and Cutting Out the Damage
Time to get your hands dirty! Dig carefully around the damaged pipe, exposing at least 6-12 inches on each side of the break. This extra space isn’t just for show—you’ll need room to maneuver your tools and fittings without fighting the surrounding soil.
Here’s a Cape Cod pro tip: cut and remove a square patch of turf with the roots still intact. Place it on a tarp in the shade, and you’ll have a perfect replacement piece that drops right back into place when you’re done.
Use a hand trowel instead of a shovel once you get close to the pipe. We’ve seen too many “simple” repairs turn into major headaches because someone got overzealous with a spade. Dig deeper than the pipe itself so trapped water can drain away—nobody wants to work in a muddy puddle.
Clean the exposed pipe thoroughly with a wet cloth. Any dirt or grit left on the surface can prevent proper adhesion and cause your repair to fail down the road. Remove about 4 inches of damaged pipe at the leak location, making your cuts as square as possible with those pipe cutters.
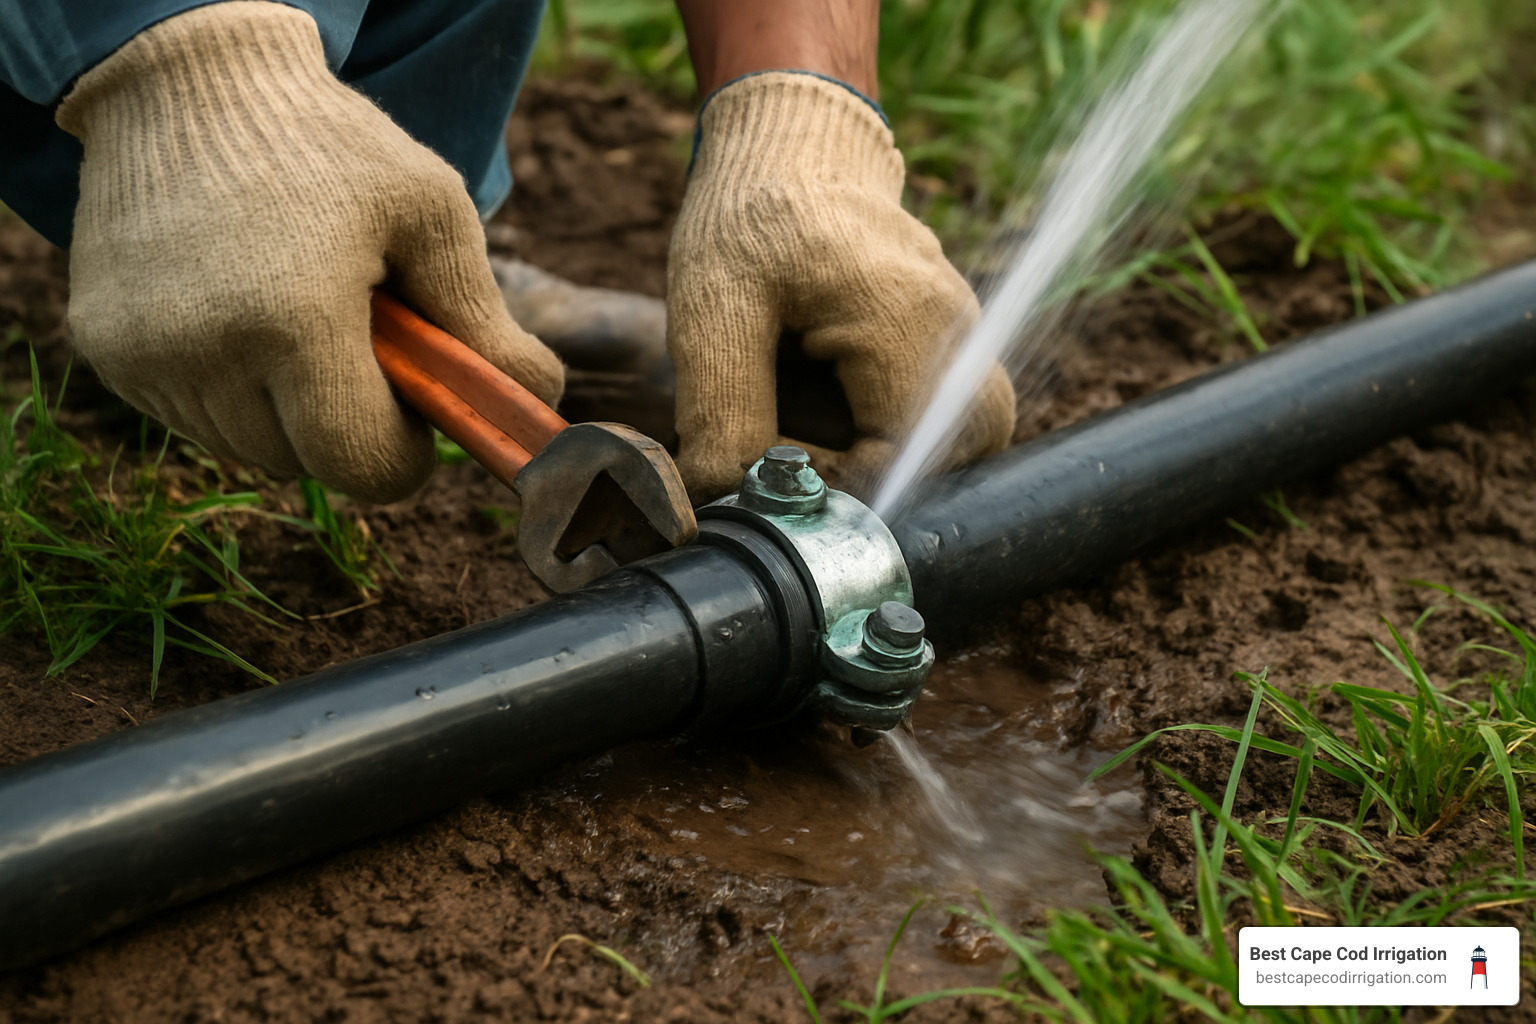
Installing the Repair Coupling
This is where the magic happens! The installation method depends entirely on your pipe material, but both approaches are more forgiving than you might expect.
For PVC pipes, start by test-fitting your slip coupling and replacement pipe section. Everything should slide together smoothly without forcing. Apply PVC primer to the pipe ends and inside the coupling—this isn’t just prep work, it’s chemically cleaning the surface for a strong bond. Follow immediately with PVC cement on the same surfaces, insert the pipe into the coupling with a slight twist to distribute the cement evenly, then hold firmly for 15 seconds. Let it cure for 3-4 minutes before moving on.
For polyethylene pipes, the process is completely different but equally reliable. Slide your hose clamps onto both pipe ends before installing the fitting—trust us, you don’t want to forget this step! Heat the pipe ends with hot water or a small propane torch to soften them slightly. This makes insertion much easier and creates a tighter seal. Insert the barbed coupling fully into both pipe ends, position the clamps over the barbed sections, and tighten with channel locks. Don’t over-tighten—snug is enough.
Many professionals use the double-clamp method on polyethylene repairs, installing two clamps on each connection for extra security. It’s overkill for most situations, but provides excellent peace of mind for buried applications.
External link on slip couplings
Testing Your Irrigation Pipe Leak Repair
Here’s where patience becomes your best friend. Before you even think about backfilling that hole, you need to thoroughly test your repair work. Turn the water back on slowly and watch for any immediate leaks around your connections.
Let the system run for a full 5 minutes under normal operating pressure. This isn’t just being cautious—it’s giving the repair time to reveal any weaknesses before you bury the evidence. Run the affected irrigation zone to confirm proper water flow reaches all the sprinkler heads.
If you spot any minor drips, don’t panic! Often a slight adjustment to clamp tightness or an additional thin coat of PVC cement will solve small seepage issues. The key is catching these problems now, not three weeks from now when you notice another wet spot in your yard.
Backfilling & Lawn Restoration
With your irrigation pipe leak repair tested and completely leak-free, it’s time to put your yard back together. The secret to professional-looking results is layered backfilling—don’t just dump all the soil back at once.
Replace soil in 6-inch layers, lightly tamping each layer to prevent future settling. Cape Cod’s sandy soil is particularly prone to settling, so this step prevents that annoying depression that appears a few weeks later. Stop backfilling about 2 inches below grade, then replace your carefully saved turf patch.
Press the edges firmly into place, add a thin layer of topsoil around the seams, and water lightly to help the grass reestablish. Keep the repair area slightly mounded initially—it will settle to the perfect level over the next few weeks, leaving your lawn looking like nothing ever happened.
Prevent Future Leaks & Maintenance Tips
The best irrigation pipe leak repair is the one you never have to do. After working with Cape Cod’s unique conditions for over 25 years, we’ve seen the same preventable problems crop up again and again. The good news? A little proactive care can save you from most emergency repairs.
Cape Cod’s freeze-thaw cycles are absolutely brutal on irrigation systems. We’ve dug up pipes that looked like they went through a blender, all because someone skipped the fall winterization. A proper blow-out removes every drop of water from your pipes, preventing ice formation that can crack even the toughest PVC. High-density polyethylene pipe typically lasts at least 50 years before needing repair—but only if you protect it from winter damage.
Smart controllers have revolutionized irrigation maintenance. These systems monitor weather patterns, soil moisture, and water usage to prevent the overwatering that stresses pipe joints and creates weak spots. Plus, they’ll alert you to unusual water usage patterns that often signal hidden leaks before they become major problems.
Modern rain sensors and pressure regulation systems also play crucial roles in leak prevention. Consistent water pressure reduces stress on fittings, while rain sensors prevent unnecessary watering cycles that can saturate soil and weaken pipe bedding.
More info about Smart Irrigation Solutions
Root barriers might sound like overkill, but they’re lifesavers if you have large trees near your irrigation lines. We’ve seen maple and oak roots completely crush buried pipes, creating leaks that are expensive and disruptive to repair.
DIY Maintenance Schedule
Think of irrigation maintenance like changing your car’s oil—skip it at your own risk. A simple bi-monthly audit during the growing season can catch small problems before they become big headaches.
Spring startup is your annual fresh start. Check and adjust every sprinkler head, inspect valve boxes for winter damage, and test your backflow preventer. Run each zone individually while you walk the system—this is when you’ll spot winter damage or settling issues that developed over the cold months.
Mid-season maintenance in July focuses on performance optimization. Monitor your water bills for usage spikes that might indicate new leaks. Verify that your rain sensor is working properly, and clean any debris from valve boxes that might interfere with operation.
Fall shutdown is absolutely critical on Cape Cod. Professional winterization protects your investment and prevents the freeze damage that causes most spring repair calls. Document any issues you noticed during the season so you can address them when spring arrives.
When to Call a Pro
While most irrigation pipe leak repair projects are perfect for weekend warriors, some situations require professional expertise and equipment. Manifold breaks near your main water line involve complex connections and often require permits. Deep mainline repairs might intersect with other utilities, making the job too risky for DIY approaches.
Multiple leaks in the same zone often indicate system-wide pressure problems or installation issues that need professional diagnosis. We’ve seen homeowners fix three or four individual leaks, only to have more pop up because they didn’t address the root cause.
Based on internet data, professional irrigation repairs typically range from $125 for simple fixes to $500+ for complex mainline work. These are average costs and not specific to our services, but they give you a sense of when DIY savings might be worth the effort versus calling in the experts.
Trust your instincts—if a repair feels beyond your comfort zone or involves electrical components you’re not familiar with, it’s better to call a professional than risk damage to your property or injury to yourself.
Frequently Asked Questions about Irrigation Pipe Leak Repair
How can I tell if the leak is near a fitting or sprinkler head?
Leaks near fittings have their own personality—they’re usually much more obvious than sneaky pipe cracks. You’ll typically see concentrated bubbling right around the sprinkler head or coming up through the soil in a tight area, rather than that mysterious spreading wetness that makes you play detective.
When water starts percolating up around a fitting, it’s often because the connection has loosened over time or the threads have worn out. Cape Cod’s freeze-thaw cycles are particularly hard on these connections. The good news? Fitting leaks are often easier to access than buried pipe breaks.
If you’ve confirmed the leak is at a fitting, you might be able to use a Leak-Stopper Ring—a specialty fitting that seals around existing connections without major excavation. It’s like putting a band-aid on the problem, but sometimes that’s exactly what you need for a quick fix.
What if the leak reappears after my irrigation pipe leak repair?
Don’t feel bad if this happens—we’ve seen it more times than we can count, even with experienced homeowners! Think of it as a learning experience rather than a failure. Most recurring leaks have simple explanations and even simpler fixes.
The most common culprits include insufficient pipe cleaning before the repair (that sandy Cape Cod soil loves to stick around), using the wrong type of coupling for your specific pipe material, or not giving PVC cement enough time to properly cure. Sometimes it’s as simple as over-tightening clamps on polyethylene pipe, which can actually damage the pipe and create new leak points.
Here’s the silver lining: once you identify what went wrong the first time, the second repair usually holds for years. It’s like learning to ride a bike—the first attempt might be wobbly, but you get the hang of it quickly.
Is an internal sealant a good alternative for irrigation pipe leak repair?
Internal sealants like PipeFuze can be tempting—who wouldn’t want to fix a leak without digging? These products work by flowing through your system and clogging small cracks from the inside, kind of like how your body heals a small cut.
The reality is that sealants work best for very small leaks—typically those causing 5 psi pressure loss or less over 30 seconds. If you’re dealing with a major break, visible water spraying, or structural pipe damage, traditional irrigation pipe leak repair methods are going to give you much more reliable, long-term results.
Think of internal sealants as a temporary solution for minor problems, not a replacement for proper pipe repair. They’re handy for buying time until you can do a permanent fix, but they can’t handle the big stuff that really impacts your water bill and lawn health.
Conclusion
There’s something deeply satisfying about fixing a problem with your own hands—especially when that fix saves water, money, and your lawn’s health all at once. Irrigation pipe leak repair might seem intimidating at first, but as you’ve seen, it’s really just a matter of following the right steps and taking your time.
The beauty of mastering these repair skills goes beyond the immediate fix. You’re protecting your investment in a gorgeous Cape Cod landscape while doing your part to conserve our precious water resources. Every leak you catch early prevents hundreds of gallons from disappearing into the sandy soil.
Successful repairs always start with good detective work. Those wet spots and bubbling areas are your irrigation system’s way of asking for help. When you respond quickly with proper safety prep, quality materials, and patient workmanship, you’re setting yourself up for years of trouble-free watering.
Cape Cod’s unique challenges—from freeze-thaw cycles to sandy soil conditions—make regular maintenance even more important here than in other regions. But they also make the skills you’ve learned today more valuable. You now know how to handle the most common irrigation problems that affect our area.
At Best Cape Cod Irrigation, we’ve been helping homeowners across the Cape for over 25 years, and we love seeing capable folks tackle their own repairs. There’s real pride in solving problems yourself. But we’re also here whenever you need us—whether it’s for complex mainline breaks, multiple system failures, or when you simply want the peace of mind that comes with professional expertise.
The bottom line? Don’t let small leaks grow into big headaches. Whether you grab your tools and dive in yourself or give us a call, addressing irrigation pipe leak repair quickly keeps your lawn healthy, your water bills reasonable, and your weekends free for the fun stuff.
Your sprinkler system works hard to keep your landscape beautiful. With the knowledge you’ve gained today, you can return the favor by keeping it running smoothly for years to come.
